
Royal icing is an exquisite cake decorating medium!
Royal icing is a hard white icing, made from softly beaten egg whites, icing sugar(powdered sugar), and optional extract flavor.
Royal icing traditionally is used for decorative designs, covering cookies and cakes (covering cake is an European tradition). It can be piped into an infinite types of decorations such as: borders, flowers,butterflies, shapes, jewelry, and so much more. It also is used for brush embroidery, creating fabric inspired lace, and cross stitching.
Royal icing can also seem a bit intimidating, if you are not familiar with using the icing. This tutorial is decimated to royal icing basics, tips, consistencies, and techniques.
What you need to know to start your royal icing journey is patience, practice, a good recipe, and basic knowledge. Once you are comfortable with the basic you can begin to pipe intricate and exquisite designs on cakes, cookies, and cupcakes!
Royal Icing Consistency:
Equipment:
- Pme writer nozzles
- PME #SuperTubes
- Cornet piping bags
- Scriber tool
- Spray bottle
- Soft #0 round brush
Material:
- Royal icing recipe
- Orange spice or Vanilla Bean sugar cookies
- Off-peak consistency
- Stiff-peak consistency
- Soft-peak consistency
- Medium consistency
- Bead-work consistency
Cooled boiled water, I like the water to be cold
Visit Shop 5th Avenue Cakes for supplies and recipes
Once your royal icing is ready gather some nozzles/tips, and cornet paper piping bags.
You may use a plastic piping bag, I however prefer a paper cornet for most of my piping. The exception is wet on wet or Lambeth piping.
Please enjoy the video and begin piping!
The detail HD Video Tutorial Lace Bridal Shower Cookie..36.32 minutes
Includes:
How to create the eyelet lace
The bead work
The lace on the top coat.
Lace is always an elegant choice!
I have created a written overview of the different royal icing consistency to help aid with the video
Start with a recipe for off-peak royal icing consistency.
Depending on what the project you are designing adjust the icing on a work board. I generally will use 1/2 to 1-cup of icing at a time
Off peak stage:
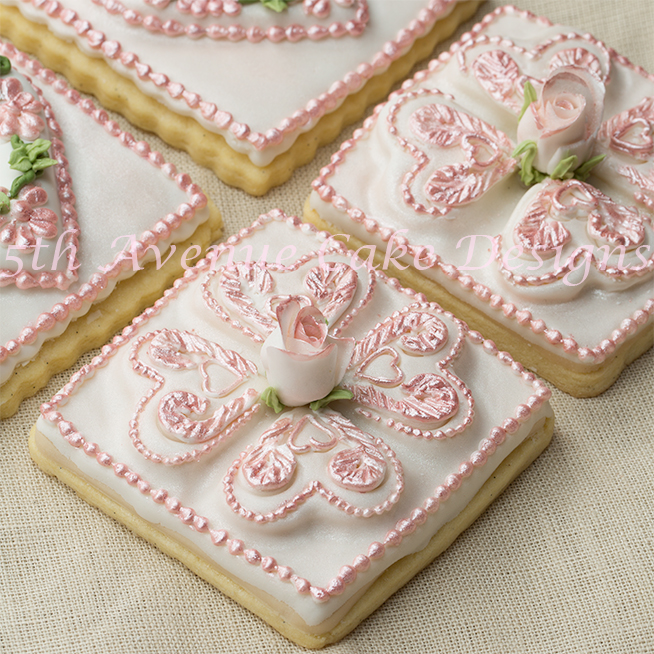
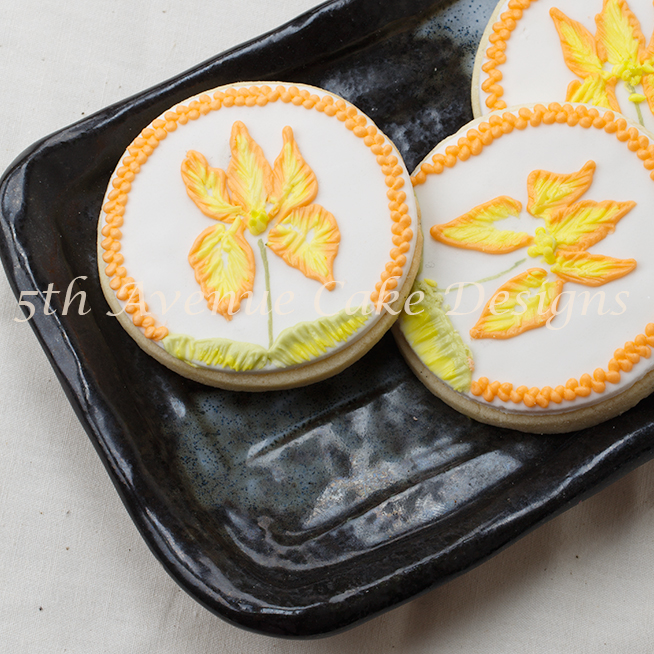
To test if your icing has reached the off peak stage, take the icing straight from mixer bowl fold a few time with a clean spatula (used only for royal icing). Now using a palate knife or spoon pull the icing upwards, the tips of the peaks should slightly bend over. Icing at this consistency is used for pressure piping, brush embroidery, piping scrolls and boarders.
Firm/stiff peaks:
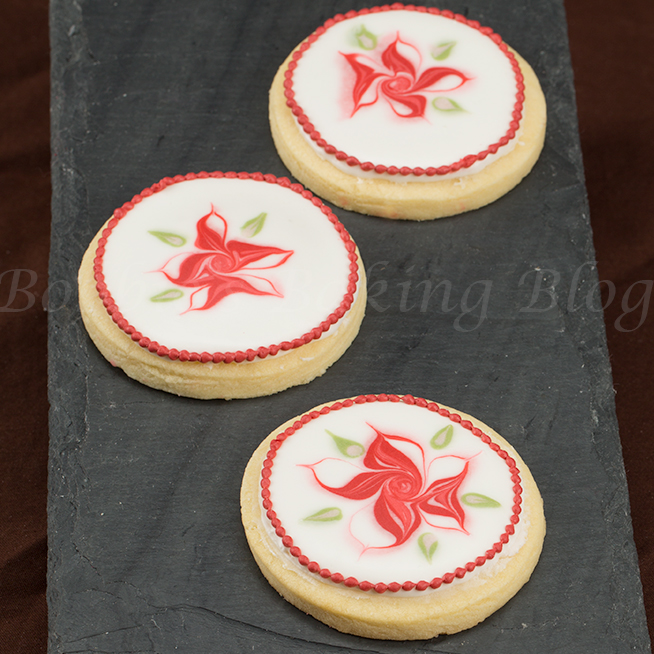
To make a firmer royal icing stir in one tablespoon of icing sugar per 175g/ 60z of royal icing (make sure you just stir it in and not beat it). If the icing becomes too thick you can thin it slightly by adding a drop of water off the end of a 5/0 artist brush. You want the icing to hold it’s shape, but it should not hurt hand to pipe with it. Stiff consistency is used when you need the icing to hold its shape firmly, icing at this consistency is used flowers, feathers, and fur.
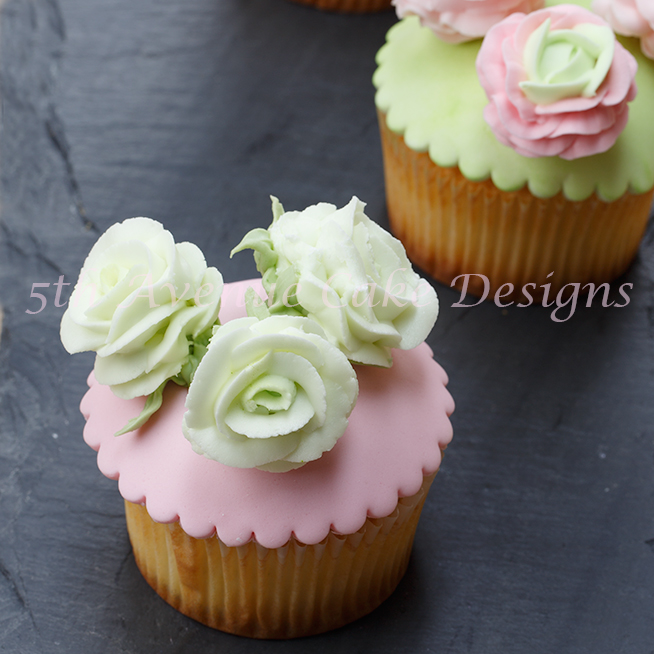
A Firm consistency is crucial for royal icing piped flowers, i.e. the Roses and Ranunculi above!
Rubbed down:
Rubbing royal icing on an non stick clean work board with a palette knife to release any air bubbles and make the icing smooth. To test this consistency pull the icing upwards with a mini palate knife the icing peak should bend over. I rub down all my consistencies prior to changing the consistency.
Soft peak stage:
To achieve a soft beak add cold water (that has been cooled and boiled) with a spray bottle add small sprints of water until the icing resemble soft serve ice cream.
To test this consistency pull the icing upwards with a mini palate knife the icing should ben over to a little loop. Icing at this consistency is used for drop string, line work, Cross stitch,and filigree.
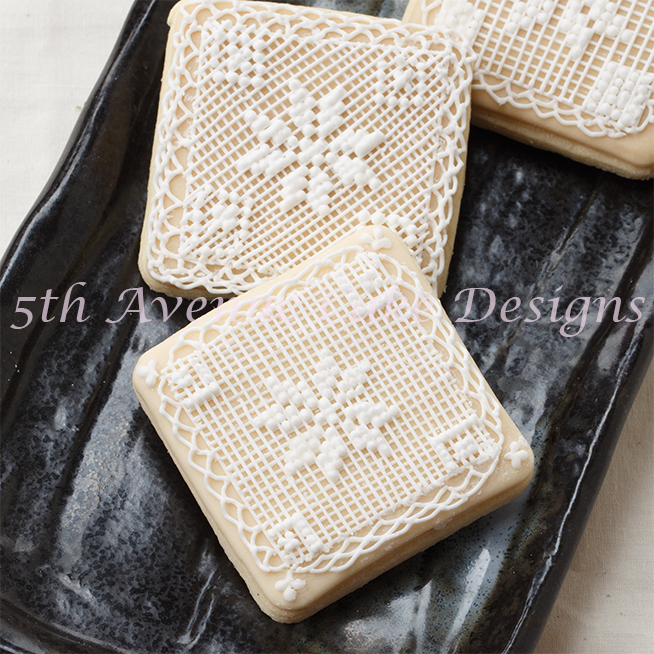
Cross stitch is one of my favorite royal methods!
Drop string on a mini cake
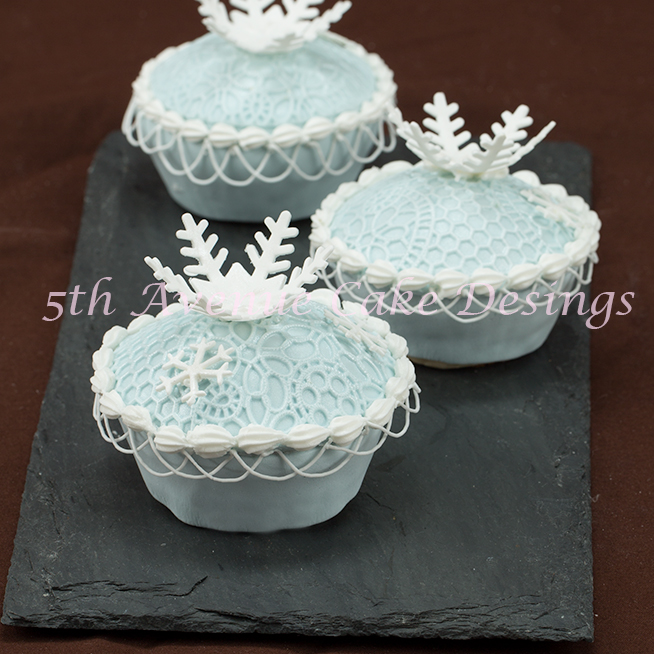
Soft peak consistency is essential for a nice drop string effect!
Run-out stage:
To achieve the correct consistency you need to rub down the icing on the work board to expel the air bubbles then add enough cold water until it takes 10 seconds when cut through with a palette knife to flow back together.
Wet on wet is a fun royal icing consistency!
Run-out consistency is used for wet on wet, collars, filling a piped outline, block letters and numbers
Top coat stage:
This consistency is very similar to run-out, but use less cold water and you will want the icing to flow back together in 15 seconds. Top coat consistency is use to cover cookies without an outline, run-outs with a curve.
Bead consistency stage:
This consistency is for creating round bead with out a peak. The best way to describe how to achieve the correct consistency is a cross of run-out and top coat. To test this consistency place the icing in your cone, pipe a few beads if the beads are round with out a peak and do not bleed together you have the correct consistency.
To save time for later projects you can pipe beads of several sizes on cellophane. Allow then to dry and store the completely dried beads in an air tight container.
Now you have beads when you need them. (This a great way to use extra royal icing)!
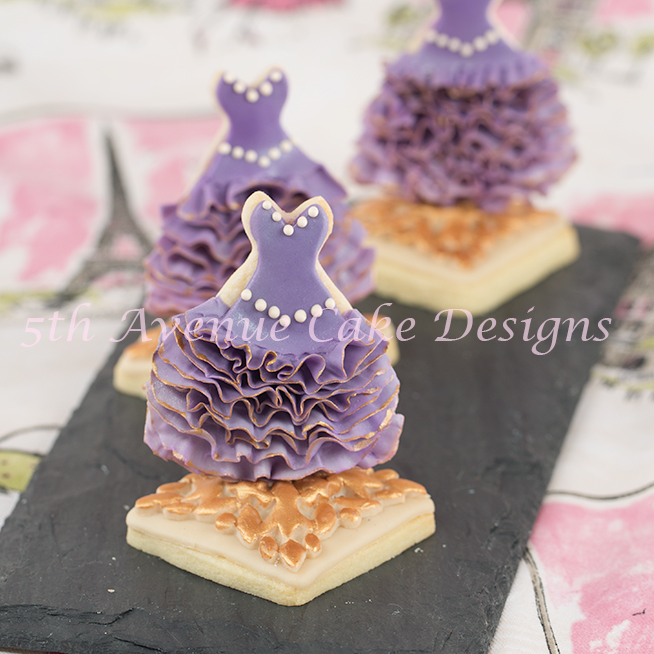
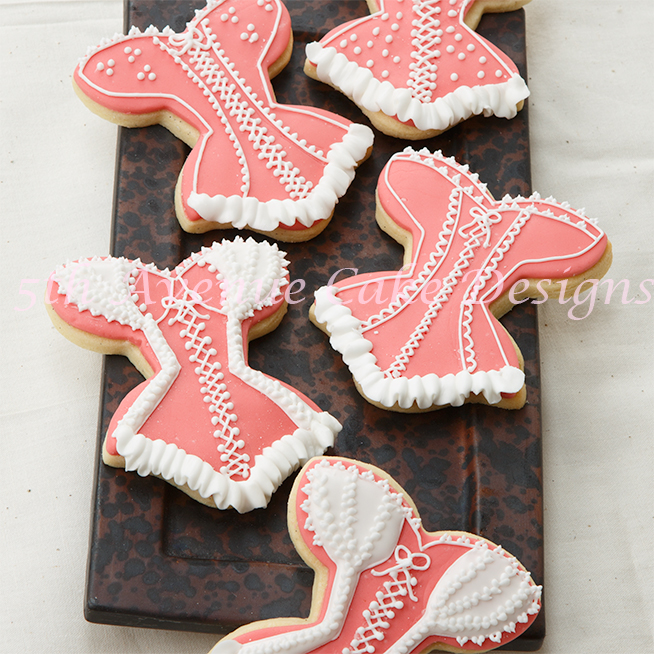
The ivory beads on the dress’ neckline was piped directly on the cookie with bead consistency.
Knowing how create the proper royal icing consistencies is 30 percent of the battle. Practice and patience is remaining 70%!
Happy Royal icing decorating!


I am very new to cookie decorating and have three questions. 1. why do you like egg white powder over meringue powder? 2. why do you boil your water? 3.why do you use gum arabic? Thanks for inspiring to continue
1. Egg white powder is pure albumen which is stronger than meringue powder.This will achieve a very smooth finish to the icing as well.
2. Boiling the water clarifies any iron or materials in the water that could effect the royal icing. If you have a water softener it will eliminate the chemicals that could effect the royal icing.
3.The gum arabic will make the royal icing more elastic and less likely to break when piping string work.
4. The glucose with keep the royal icing from becoming brittle.
I hope this helps Cindy.
This helps alot, I like to know the chemistry and technique behind baking. In my opinion, a recipe is just a recipe until you know these things so thank you so much.
I completely agree and glad I was able to help! 🙂
Dank je wel voor de superuitleg! Ik ben hier erg blij mee en zal me nu ook eens aan het koekjes versieren wagen voor de kerstdagen! Nogmaals…heel erg bedankt!
Groetjes, Marja. 🙂 :flower
Sorry…My first comment i wrote in Dutch! And i think you can’t read that, so here’s my english one!
Thank you for your great explanation about the use and making of Royal Icing! It is very complete and answers all my question i ever had about Royal Icing. I think i’m gonna try it it soon on my Christmascookies. Thank very much again, i’m really glad you made this article.
Have a great weekend and till next time.
With love, Marja. 🙂 <3
Thank you I am glad I could help. I would love to see your christmas cookies!
Hello from Singapore, I love ur royal icing recipes. I can’t get egg white powder. So I use raw egg whites instead, wth lemon juice. Overall the icing is kinda rough. If I am using egg white, can I add on glucose so tat my icing will appear smoother? Would appreciate ur advice. Thanks.
Thank you Veronica, I generally use raw egg whites. Add 1/8 teaspoon per 226 grams of royal icing, be sure you mixer is on the lowest speed with paddle attachment attached. You might need to add more egg white if the icing is too stiff. I live in Colorado the climate is quite dry, depending on your climate, in Singapore, you might need to tweak the recipe. I hope this helps.
Best tutorial on Royal Icing. I have had a few attempts at doing this myself but could never really work out the consistency right. Your explanations were the clearest yet. Thank you. I would be happy with to go on your personal blog, if you have one. Thanks
Thank you Debbie
Hi! Thank you for this! In the picture with the purple dress – how did you achieve the ruffles on the dress?
Thank you Ruvi,I will be creating a tutorial on that dress very soon.