
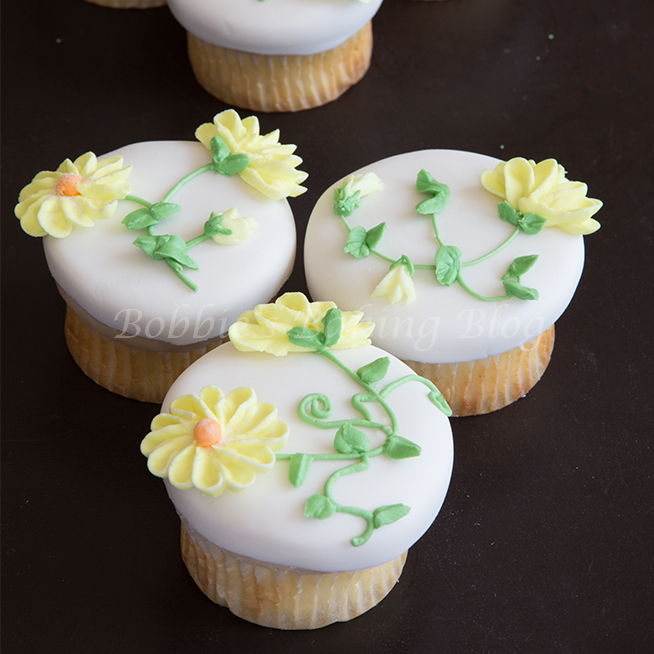
Spring is finally here!
It would seem Colorado wants to hold onto winter, we have had 3 major snow storms every Tuesday for the last 3 weeks; today we finally seem to be warming up. I thought if I decorated some daisy cupcakes I might give colorado a punch in the arm, so to speak. If know anything about Sydney and I we love warm weather, once Christmas has past we start dreaming of the balmy spring days.
Sydney and I find use out of the t-shape parchment paper under a piece cellophane and visualizing the nail head is a clock to insure realistic daisies every time. Sydney had the idea of the “T” shape parchment to guarantee your daisy will have 12 equal petals. After piping quite a few daisies you will find that you are able to pipe beautiful daisy without using the “T” guide.
Royal Icing Daisies:

Yellow and orange give a warm glow!
Material:
- 1-recipe for cupcakes
- 1-recipe for royal icing, off peak consistency
- 2-tone method
- Daffodil or lemon color paste
- Sunset orange color paste
- Leaf green color paste
- Chocolate brown color paste
- Sparkle sanding sugar
Equipment:
- Petal tip pme #57R, wilton #101, or ateco #102 tube/tip
- Leaf tip, PME # ST52
- Pme#52
- PME write # 2 and #3 open tip/tube, or PME 3 7
- Couplers
- Piping bags or parchment cones
- 1- icing nail
- Cellophane squares
- Superfine sugar
- Parchment paper squares, pre cut for the nail head
- Toothpicks
- Pme Icing Stand
- Pre-cut cellophane square
Prepare your mise en place.
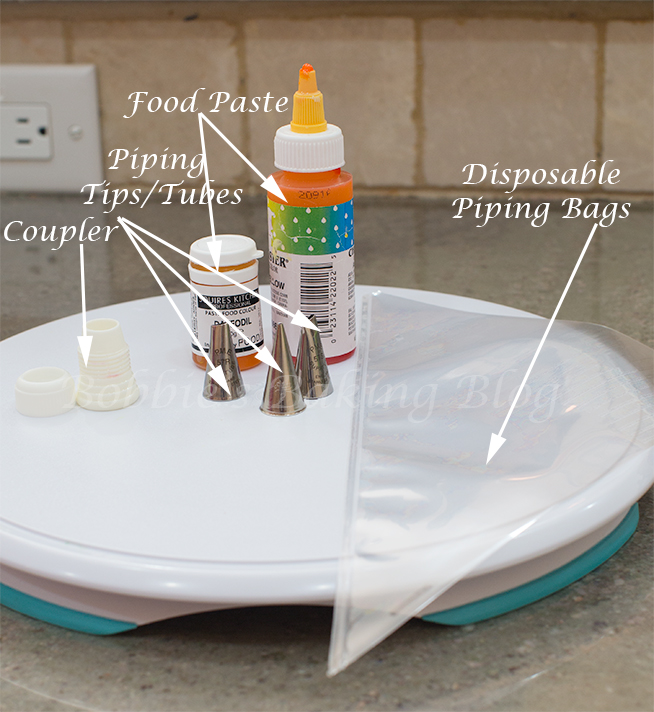
Royal icing mise en place
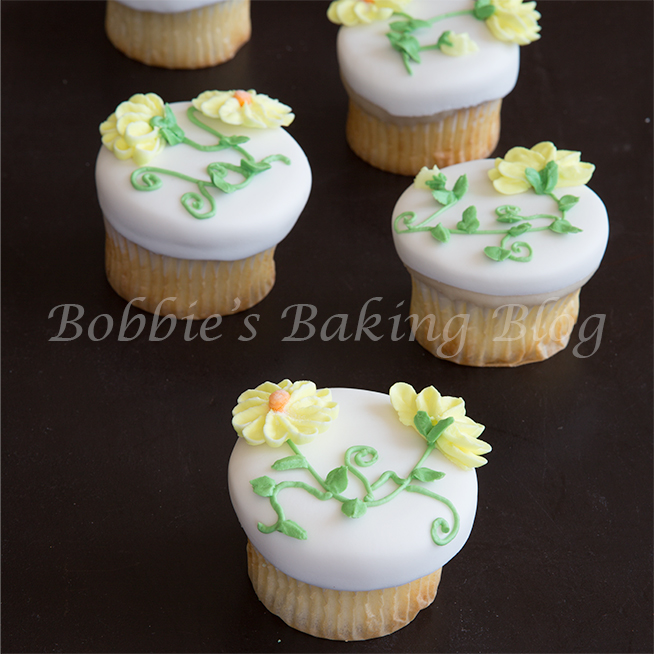
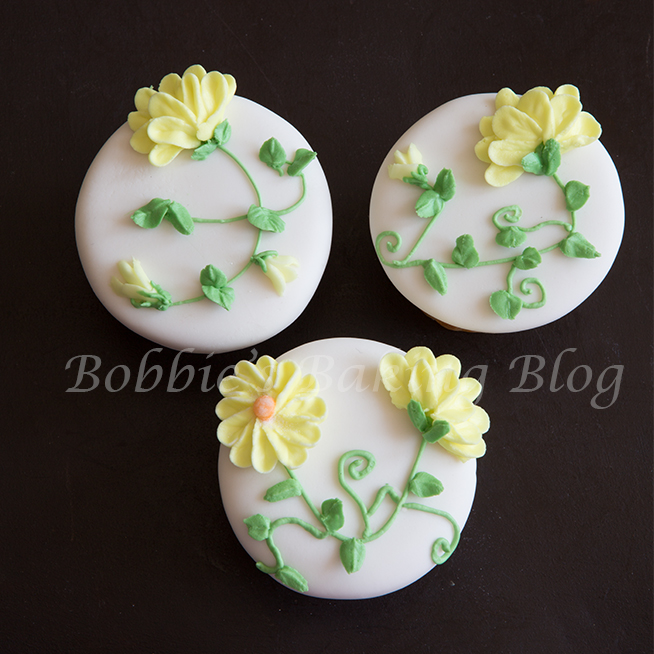
Full Daisy:
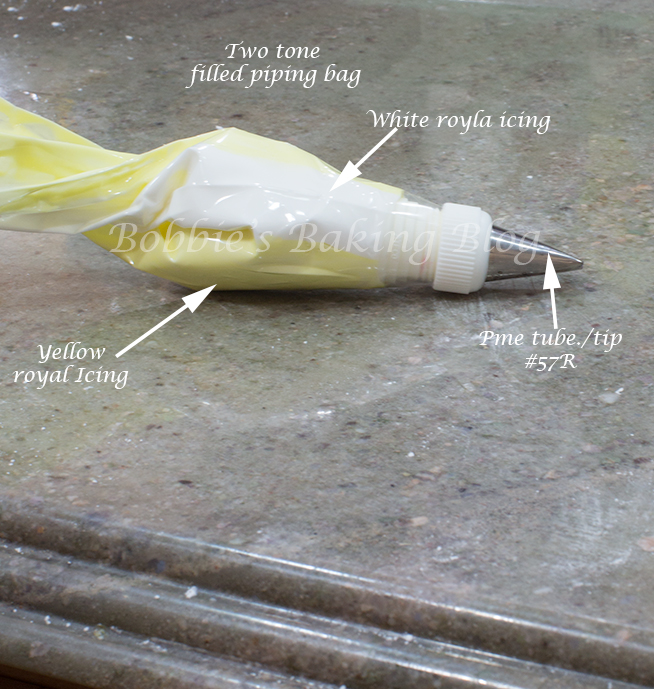
Prepare three royal icing cones or bags, one fitted with a petal tip, one with a leaf tip, and either a star tip or #3 open tip. For the petal tip bag pipe a line of off peak consistency white royal icing from the narrow end of the tip/tube. Pipe off peak yellow royal icing from the wide end of the tip, you will want a ratio of 3/4 yellow and 1/4 white. Fit another piping cone/bag with a coupler and PME #2 (you will need to change to a #St52 leaf tip/tube for the leaves) and fill half the cone/bag with a spring green, and for for the last bag fit the cone/bag with a star tip or open tip and fill half the cone/bag with orange royal icing.
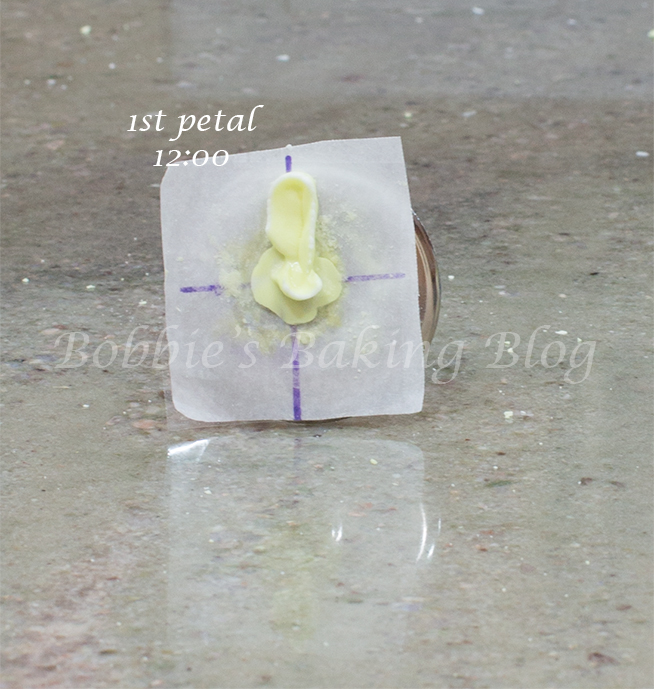
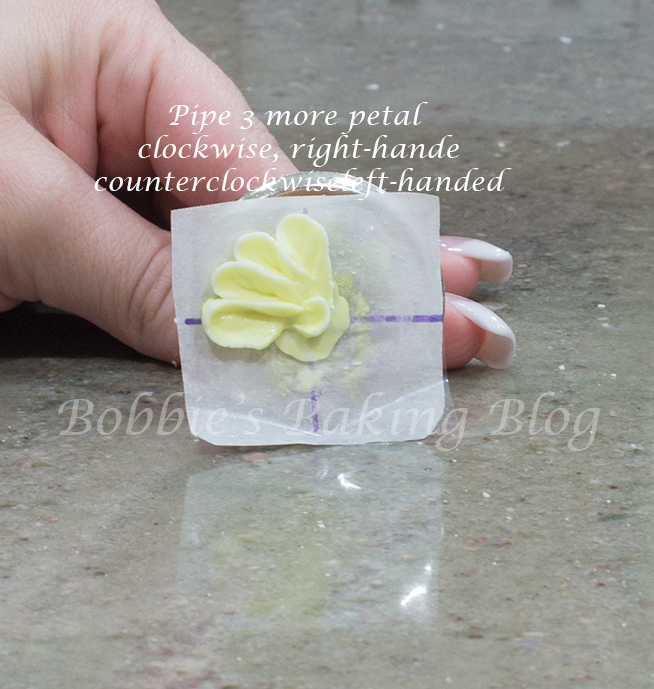
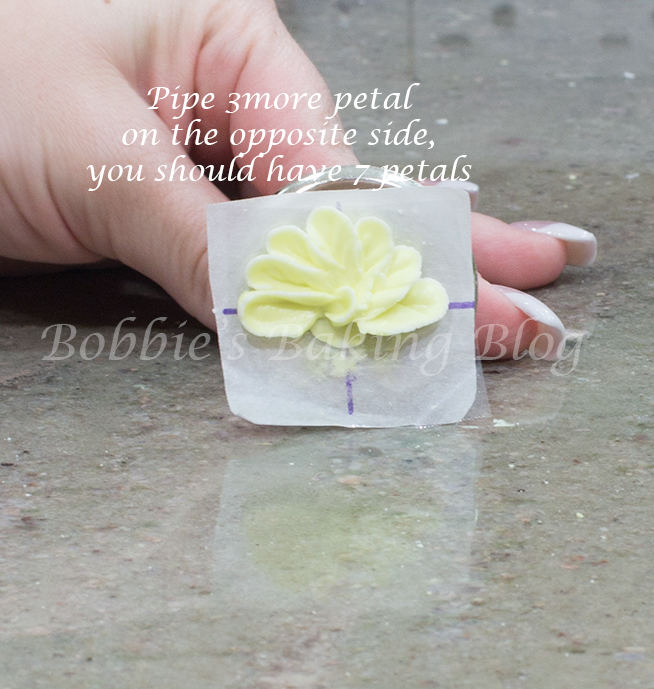
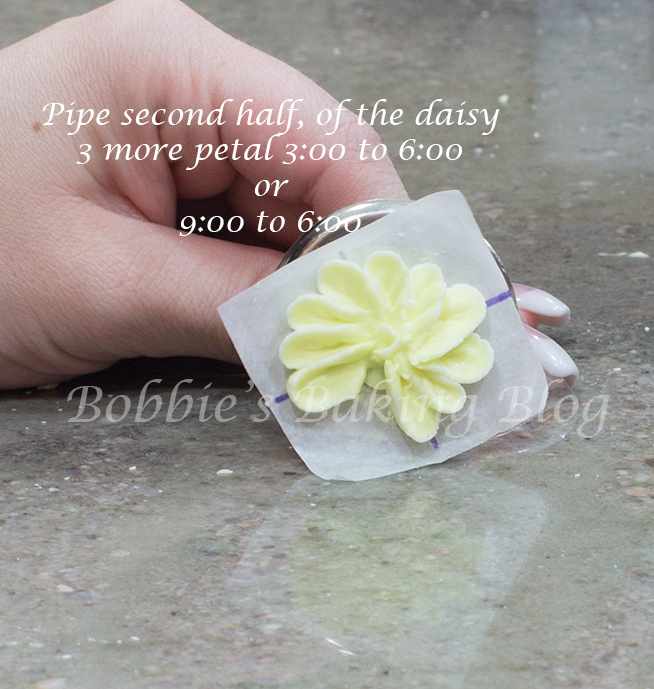
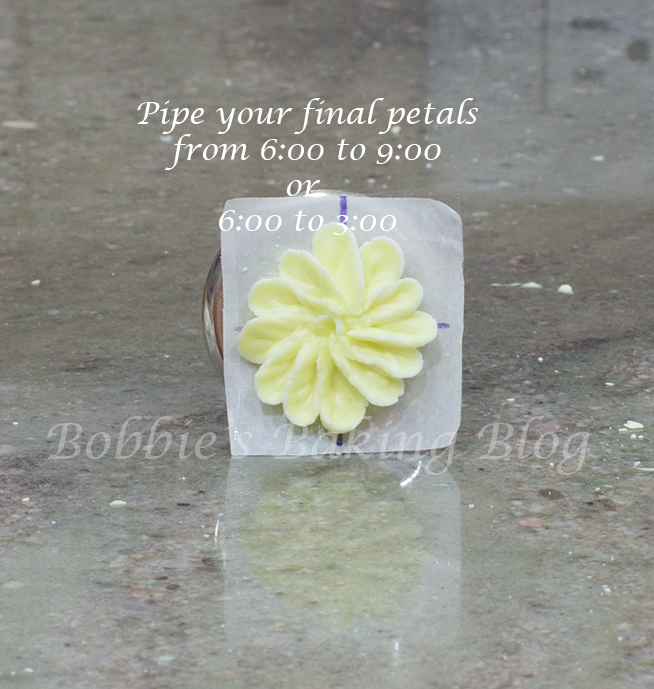
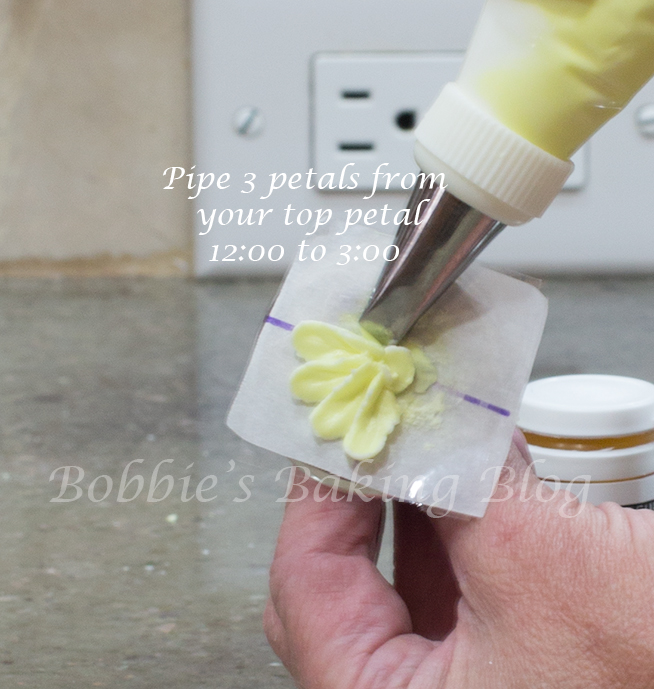
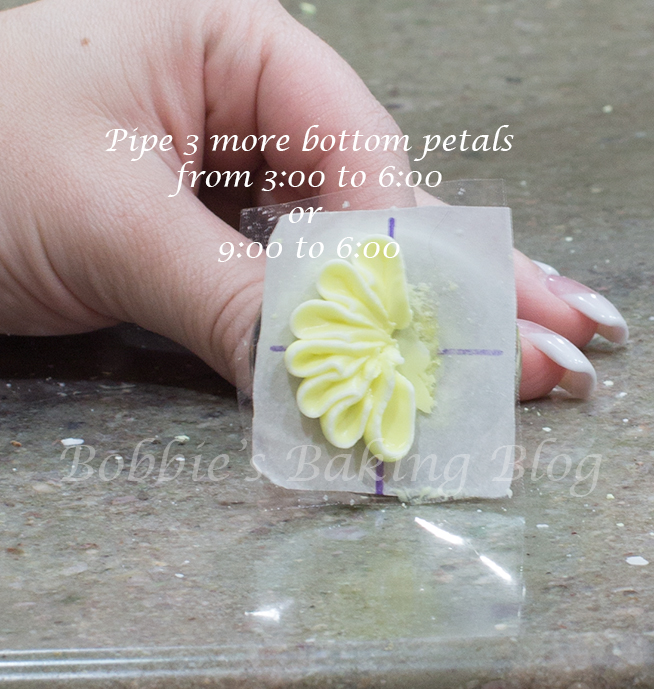
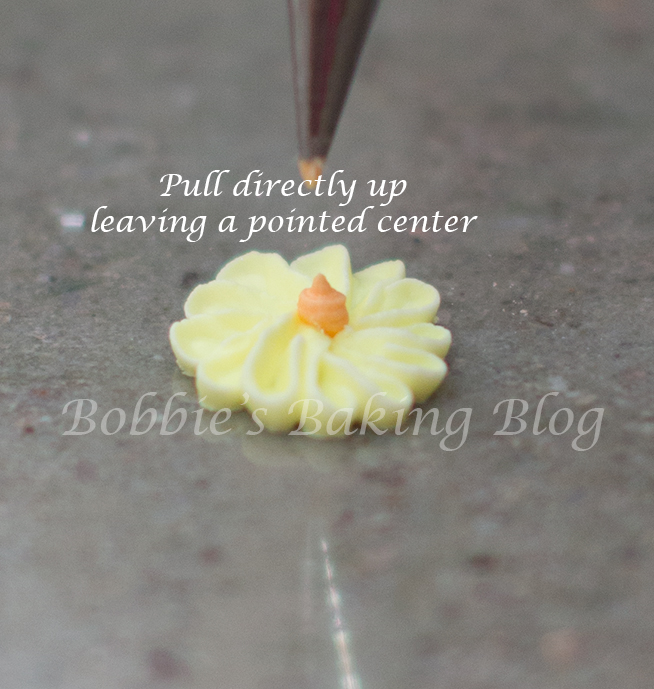
Cut 20 1.5-inch/3.8 cm squares of parchment paper with a t-shape guide, and 28 cellophane squares. Using the royal icing as a glue attach the parchment paper guide, and then attach the cellophane square to the parchment paper. Add a drop dot in the middle of the t-shape, place the wide end of your petal tip/tube, angling the narrow end slightly up, on the center dot. With even pressure, and the icing nail facing you, begin to pipe as you move the petal 1.28 cm/ 1/2-inch toward the outside edge of the nail. Turn the icing nail slightly counter clockwise, and bring the petal tip down to the starting point (keeping the petal slightly above the nail to achieve a curve). Continue to pipe the petals close together, following the t-shaped guide, each quad should have three petals including the line you began on. Once you have the petals correctly piped following the guide you may remove the t-shaped guide. The guide will help you achieve the 12 petals. Allow the daisies to dry completely; this step can be done days ahead of time.
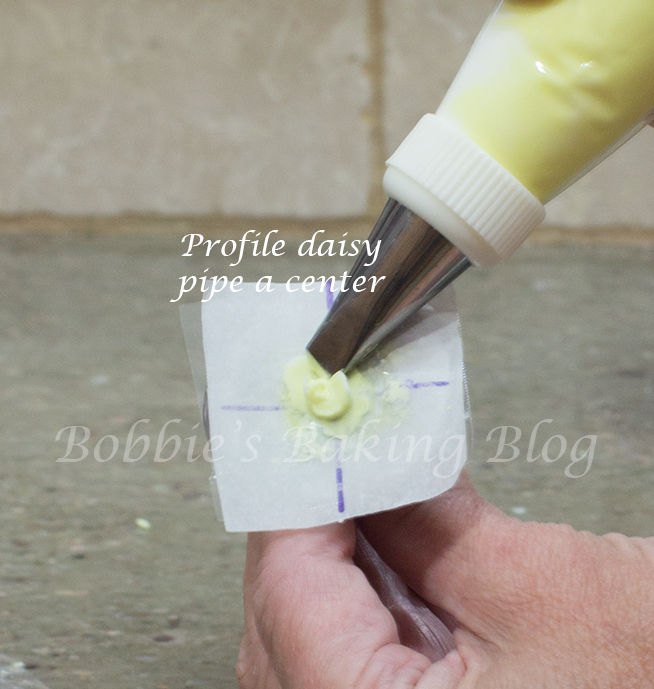
Profile Daisy:
For a profile daisy, pipe six petals closely together, using the t-shape guide on the vertical line, and once the six petals are piped, pipe six additional petals slightly smaller, and between the first six petals.

Center of the Daisies:
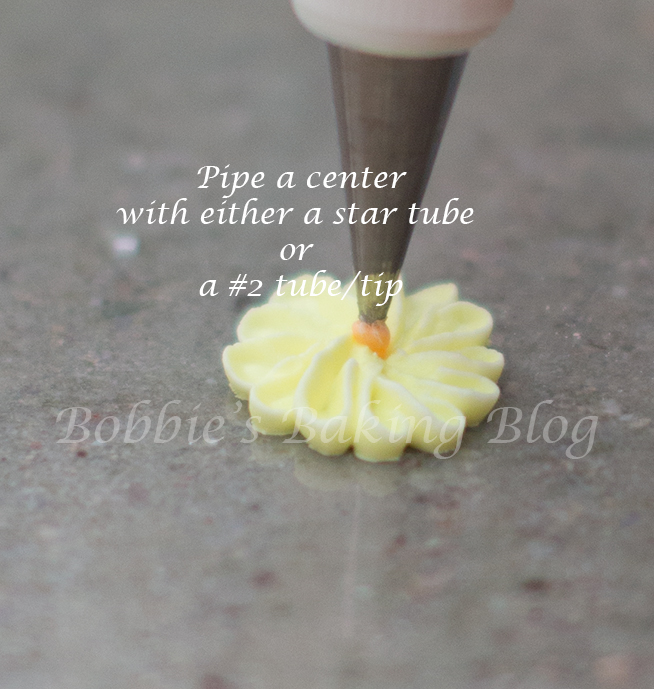
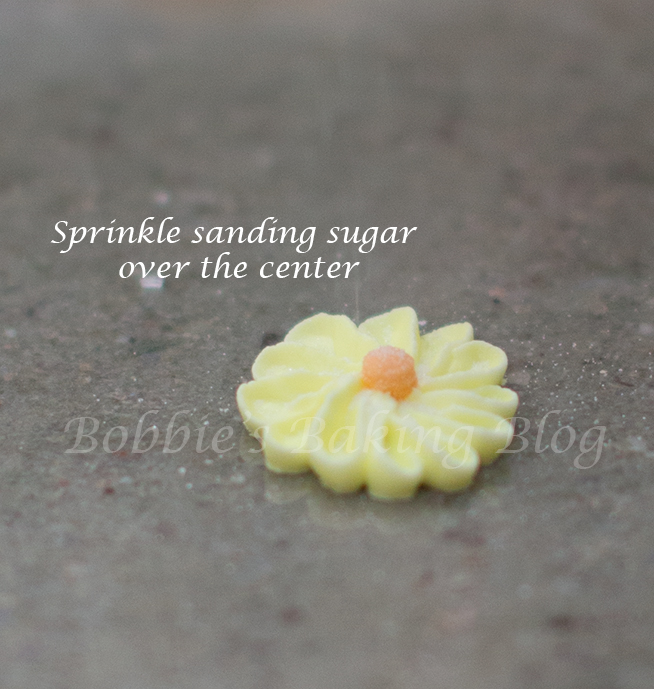
Once the full daisies and profile daisies have dried, have a prepared cone or bag fitted with a a #3 open tube/tip or #7 PME star tip/tube,pipe either a star center or peak a round center with off peak consistency icing, immediately after piping the center sprinkle with sanding sparkle sugar. Allow to dry.
Adding Leaves and Assemble:
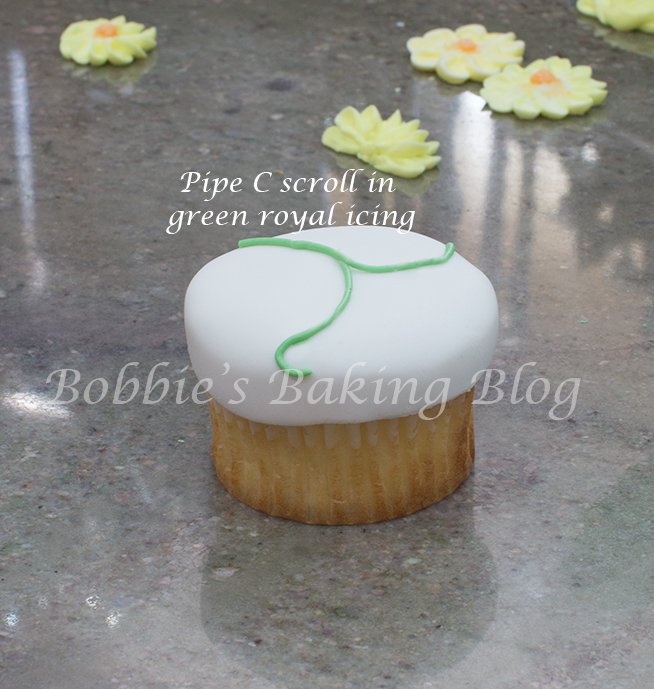
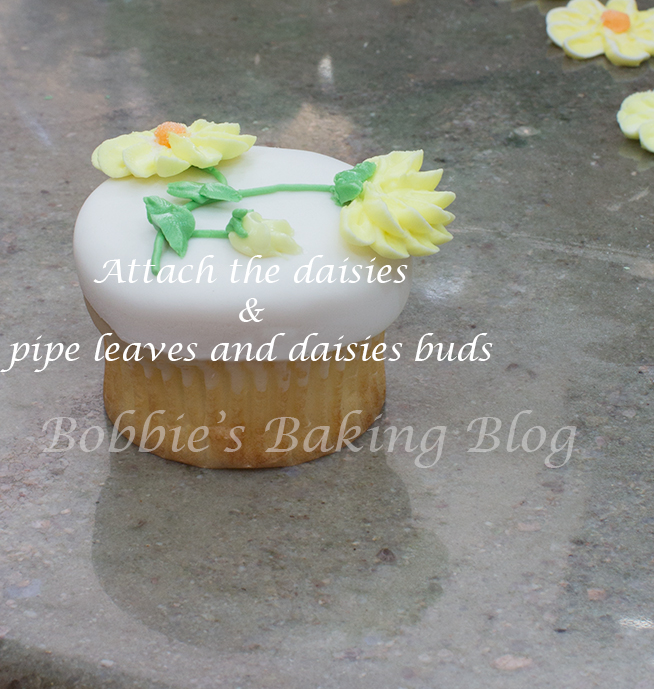
Prior to attaching the daisies pipe a 2 to 3 “C” scrolls vines (for a cupcake). To attach the daisies to either a cupcake, cookie, or cake pipe a small amount of royal icing on the back of the daisy, place the daisy on the vine. Add a few leaves.
Hopefully spring has already sprung in your town, state, country either way celebrate spring with royal icing daises!
This is a great activity to teach your children/grandchildren!
Enjoy!
Voila!


These are beautiful! I may try my hand at a version of these for a baby shower I am helping to host next weekend. I wonder how much practice it will take me to get it close to right. Enjoy the Colorado weather this weekend! I know we will!
Thank you Holly, it shouldn’t take that long if create the “t” shape square.
Great tutorial! Thank you for sharing!
My pleasure!