
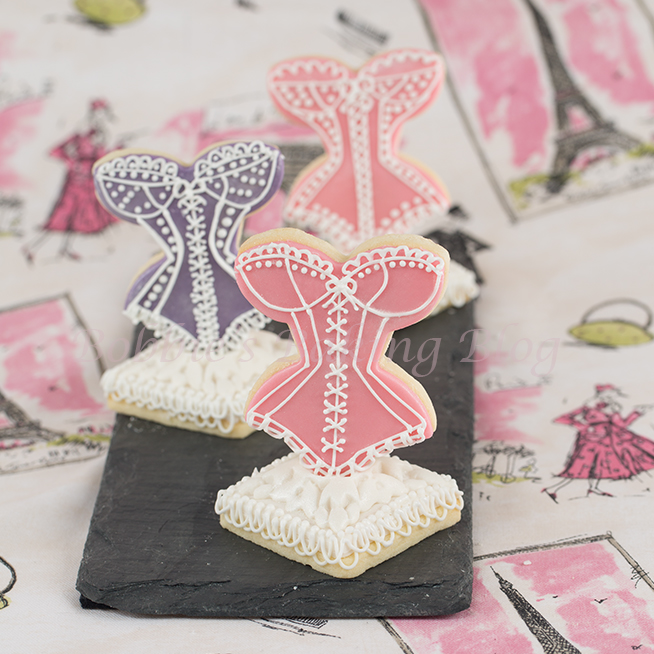
Romance is in the air!
I was organizing my cookie cutters, and I came across a beautiful copper corset cookie cutter Sydney had given last summer. I couldn’t believe I had not used it yet. Since Sydney loves fondant I covered them in strawberry flavored and mocha-cinnamon fondant, from Fondarific. The decorative details are piped in royal icing. While Sydney and I were FaceTiming she suggested they would look best 3-D on a fondant molded stand with royal icing string work.
Corset Sugar Cookies:
This is a brilliant way to use cake decorating piping techniques, without baking a cake!
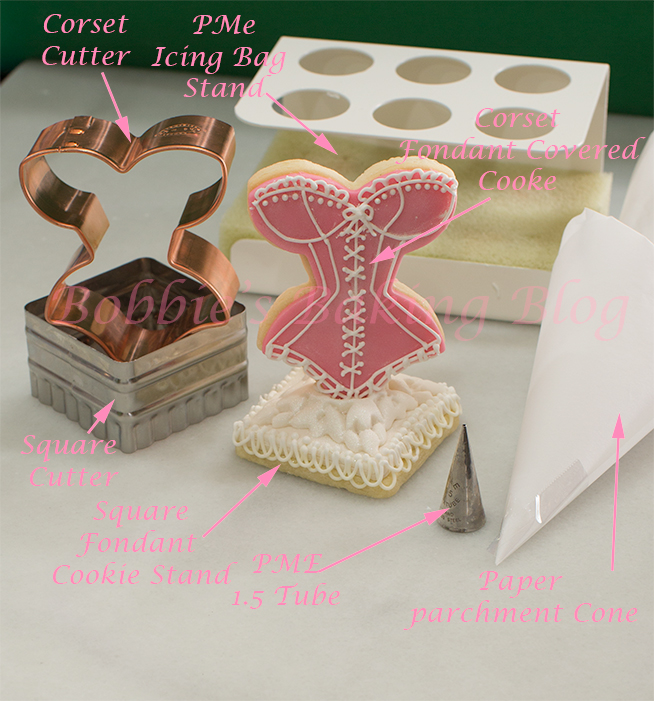
Equipment:
- Corset cookie cutters
- Square cookie cutters
- Jewel mold
- PME icing bag stand
- Fondant smoothers
- Fondant rolling pin
- Parchment cones/cornets
- PME tip/tube 1.5
- Artist brushes
- Pasta Machine, optional
- PME scriber needle tool
Materials:
- 1-recipe for Vanilla Sugar Cookies
- 1-recipe for Royal Icing, soft peak consistency
- Fondant
- Food color paste, your choice
- Pearl petal dust
- Piping gel
- Edible glue
Prepare your mise en place.
Decorating mise en place
The Corset
Knead and roll your fondant to 1/8-inch thick either by hand or on a pasta machine. Using the corset cutter cut out a fondant corset, brush a thin layer of piping on the top of the sugar cookie lay the fondant corset on the cookie, and smooth with fondant smoothers.
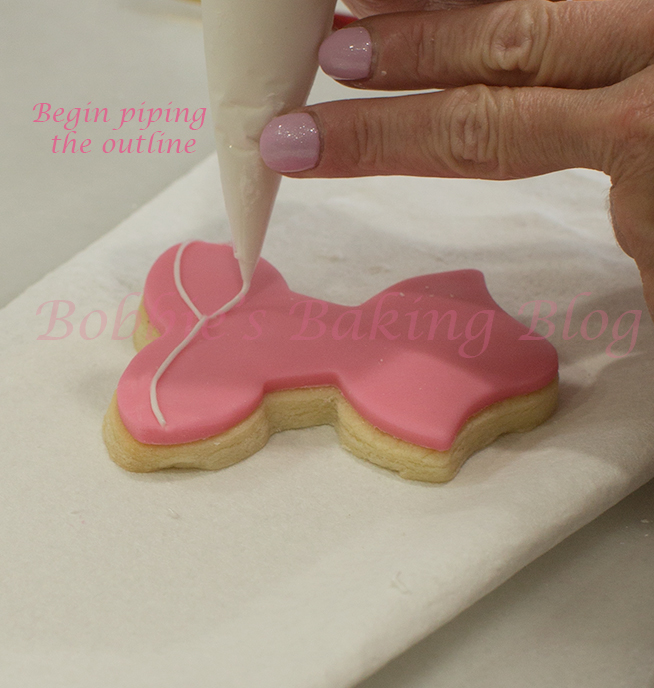
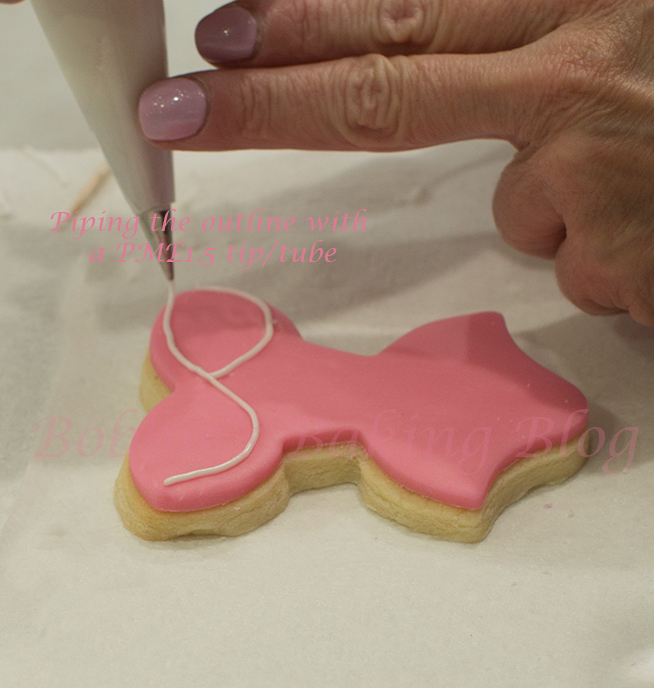
Prepare your royal icing cornets or piping bags, fitted with a PME 1.5 tip/tube of soft peak icing. To test that your royal icing is the correct consistency pipe a line from your fore finger to your middle finger, move your fingers slightly up and down; if the line doesn’t break quickly you are good to go! If you prefer to cut the tip of the cornet to the correct piping size in lieu of using a tip/tube that works fine as well. However I would not place the cornet in the holder, instead place a straight pin in the whole, (this will keep the icing from developing a crust).
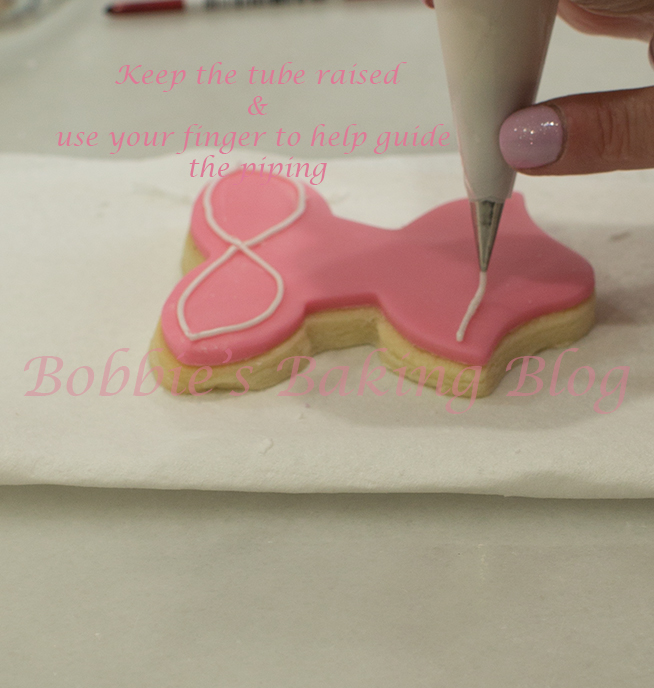
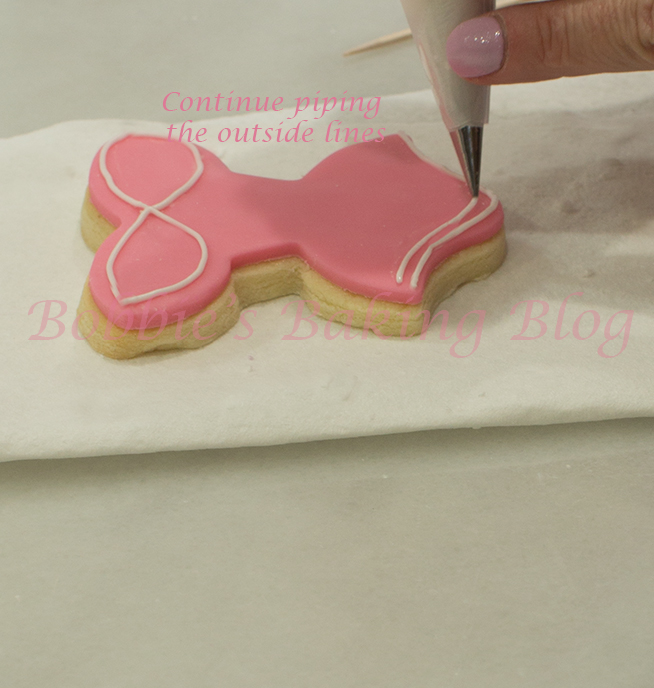
Begin piping the outer details of the corset. Hold the bag in your hand like you are holding a coffee mug, release pressure from the top of your hand to the bottom. Touch the tip at your starting point, lift the tip up and use your other hand’s fore finger to guide your line and curves. When you have reached your stopping point stop the pressure and bring the tip down to connect to the previous piped line.
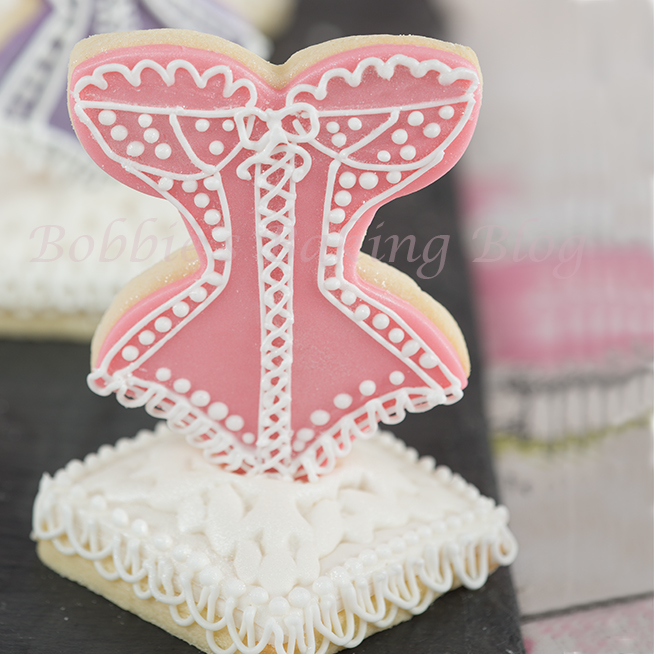
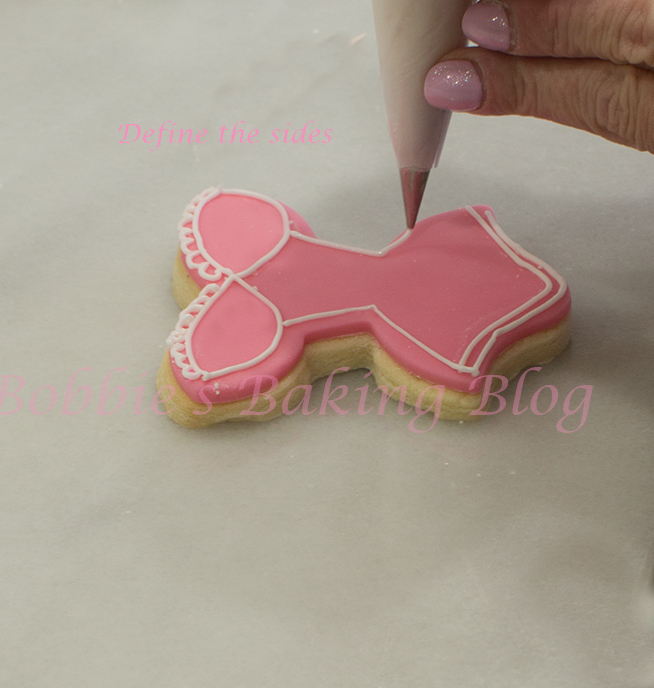
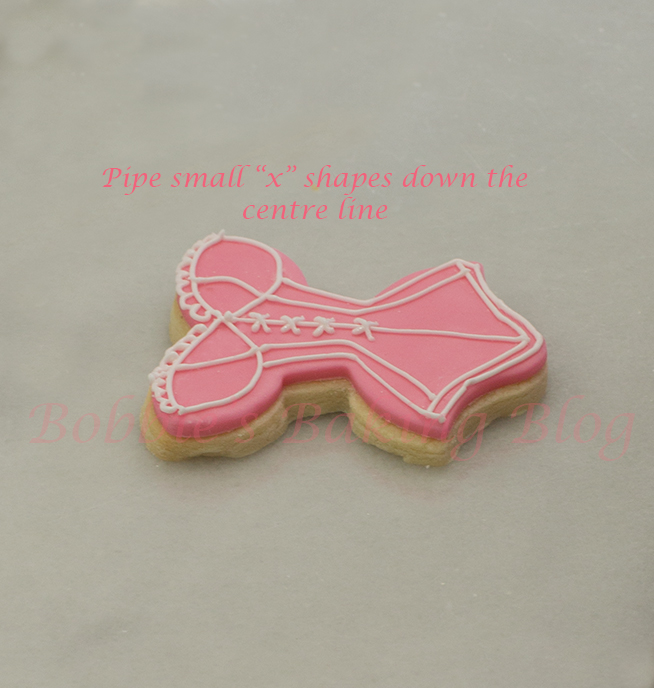
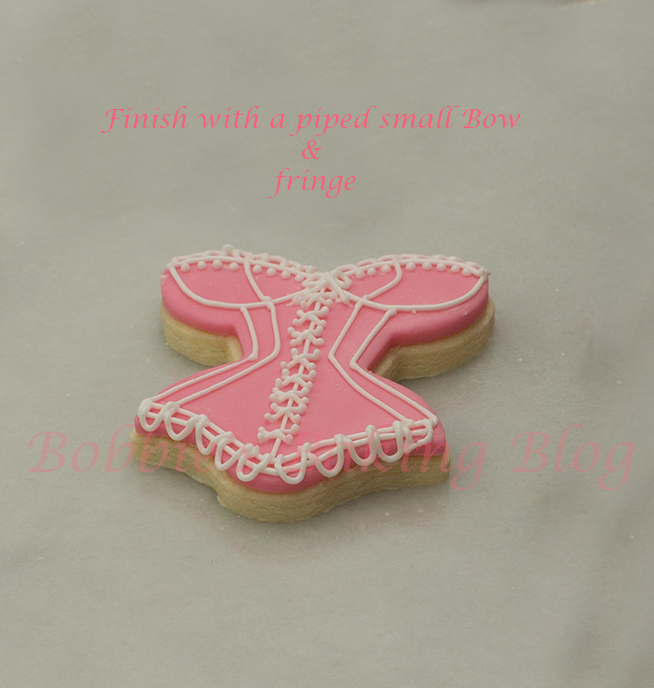
Once you have piped your outer lines of definition start adding the decorative touches; have fun and be creative. We piped beads, string work swags, little “xs to resemble the corset string, and tiny bows.”
The Decorative Stand
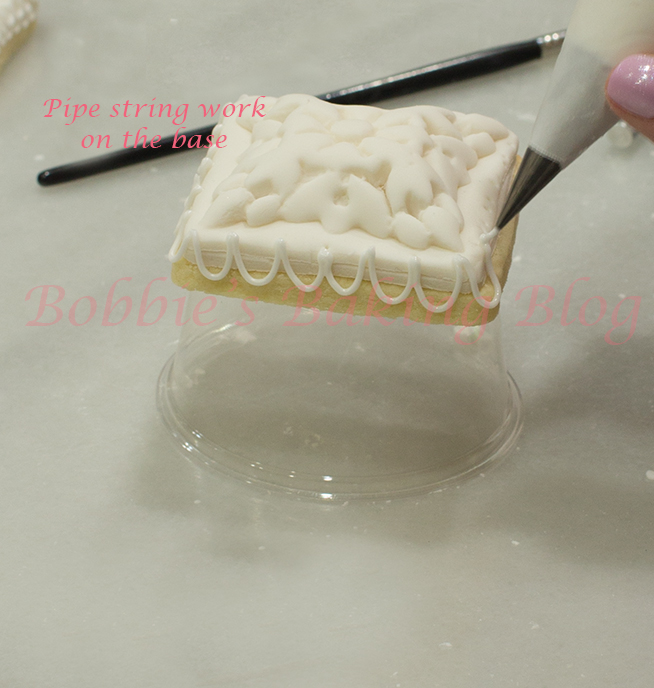
For the stand we used a jeweled mold, mixed cinnamon bun flavored fondant with mocha flavored fondant (a favorite flavor). Placed a square sheet of fondant in the mold and pressed the fondant to create the jewel. I had already attached a plan square of fondant on the cookie, by using the same square size cutter I had used for the cookies, cleaning the sides, and brushing a thin layer of piping gel on the cookies to adhere the fondant. To bind the jeweled fondant use edible glue or water on the edges and align in place. I placed the cookie on a plastic container, upside down, and proceeded to pipe swags around the cookie.
The Swags
Mark your cookie. Using a scriber tool or toothpick, mark on the fondant on the cookie’s surface in the center of each square, measure 1 mm from each center mark, scribe the 1mm. Use where the fondant and cookie meet as your guide for length.
With a slight amount of pressure pipe a string on your royal icing from the the first scriber mark to the next scriber mark, and continue around the cookie. To add a swag in-between pipe from the middle of the first swag to the middle of next swag and continue around the cookie. To add beads to the swag, use bead consistency royal icing to add beads to your swag markers. Keep your beads evenly spaced. The closer your tip/tube is to the cookie the more control of gravity you will have on your swag.
The stand and corset were brushed with pearl petal lustre and disco white.

Assemble:
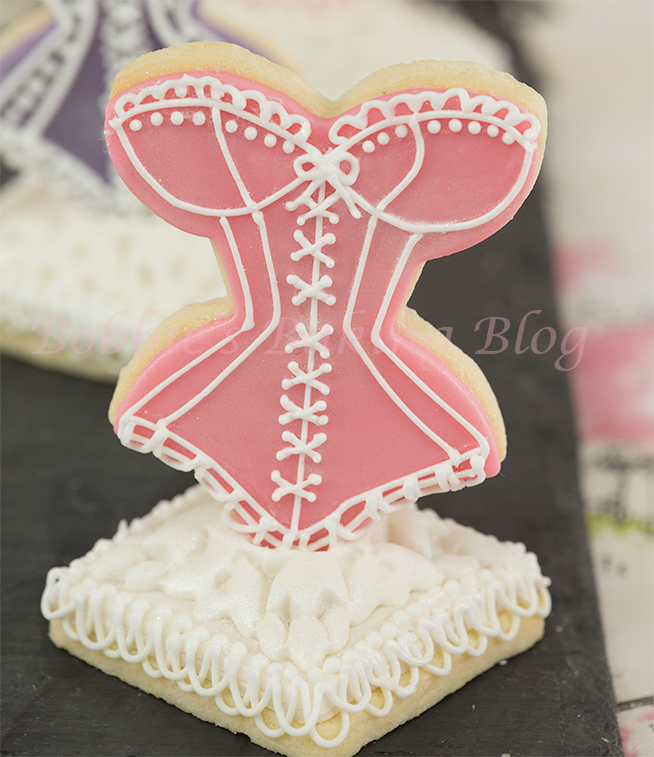
You have a few mediums to attach the dress cookie to the jewel stand, Royal icing, chocolate melts with freeze dry, or what I chose fondant glue. Take the extra pieces of fondant and add a few drops of water, at a time, smoosh the mixture with a mini straight frosting spatula until it becomes gooey. Apply the fondant glue to the stand and the bottom of the dress cookie, place the two pieces together, and hold for a few seconds or until the corset stands by it’s self.
These corset cookies have an elegant touch when using cake decorative piping techniques.
The cookies are a little time consuming due to the piping, but they are loads of fun to create and look brilliant.
The fondant seals the cookies and keeps them soft and fresh, fresh enough to send a college care package to Sydney!
Enjoy!
Romance is in the air!

Voila!


I am so loving this decorated cookie! Really quite stunning and the stand is a great touch!
Would be great for a bridal shower or lingerie party 😉
Thank you!
So pretty.
your cookies are really beautiful, your tutorial seems easy, but I think I would make a disaster! 🙂
Thank you Marta, if you need any help let me know. I believe you would create wonderful sugar cookies!!
GOOD Morning! You are an Amazing cOOkie and cAke artist! Thank YOU for SHARing your creativity, talent and passion! My life is extremely hectic like everyone else, but one of the ways I try to de-stress and insert little moments of happiness, joy and fun into my days, is to pin beautiFUL cOOkie/cAke CREATions…and dream of the day that I can try my hand at decorated cOOkies… 🙂 Many and continued BLESSings to you and yours!
Thank you Cindy, if need any help with your cookies please let me know!