
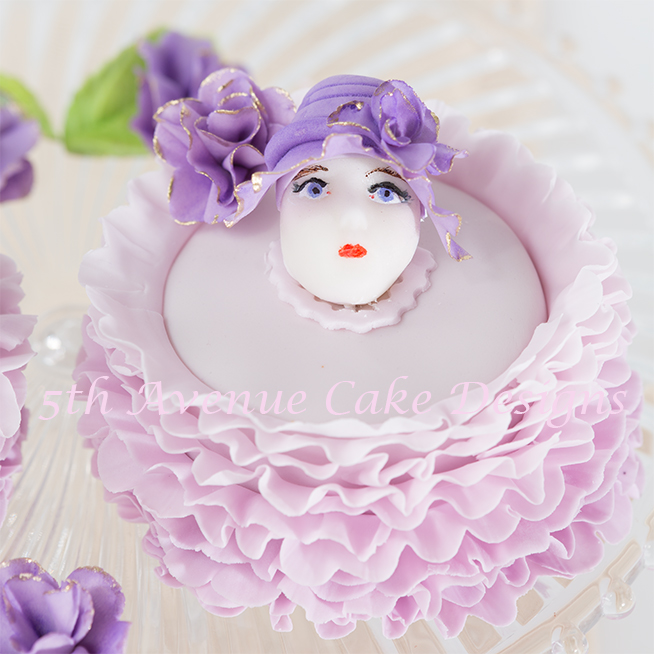
“Easter bonnet with all the frills upon it”
Moulding a face or figures can be intimidating regardless of the medium, let alone a disk of modeling chocolate. I am going try to eliminate the anxiety of modeling chocolate decorating.
First you need to understand modeling chocolate, it is basically two ingredients chocolate and corn syrup (or glucose).
Secondly: The ratio of the two ingredients are critical, generally the ratio works out to be 2 parts chocolate to 1 part syrup.
Third: Unlike fondant and gumpaste, air is not the enemy, heat is. The modeling chocolate works best in a temperature of 22 degrees C/72 degrees F.
Once you have an understanding of modeling chocolate you can begin to experiment with shapes, and from there you can create almost anything.
Modeling Chocolate Face and Bonnet:
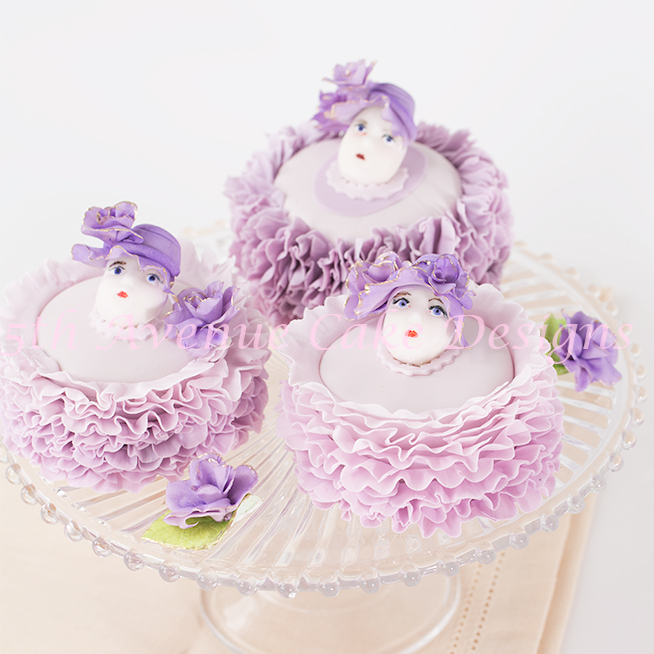
The mini cakes remind me of movies from the 1940’s!
Equipment:
- Pasta Machine
- Fondant smoothers, JEM
- Face mold, MYOM
- Circle cutter
- Knife
- X-acto knife
- 24 gauge wire
- Foam pad
- Frill, Garrett cutter, OP
- Ceramic frill stick, HP
- Medium cel stick
- 5 petal cutter small, OP
- Artistic brushes
- Plastic bags
- Fresh mat
- Tooth picks
- Viva Paper towels
- White floral tape
- Wheel cutter
- Clay gun, Makins
Materials:
- Food paste, Red, black, violet, white, & brown
- White modeling chocolate
- 50/50 fondant & gumpaste,for the bonnet
- Edible glue, sugar water, egg white, or store bought
- Gold lustre
- Petal dust, NYCake
- Everclear
- Corn starch
- Crisco
- 1-recipe Rose Blossom Cake, or your favorite cake
You can find the supplies here
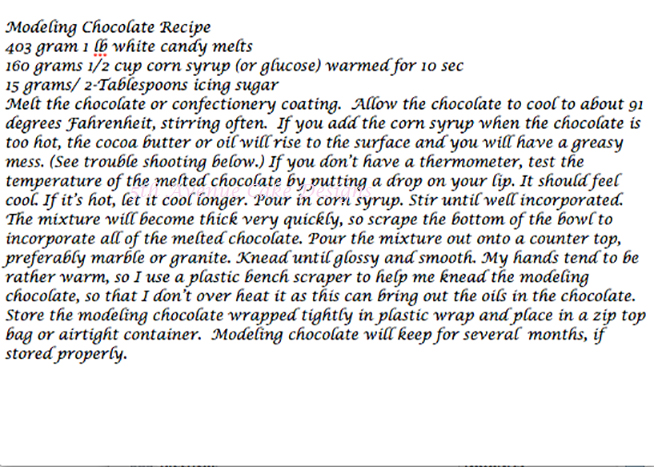
5th avenue cake design modeling chocolate recipe
Your modeling chocolate should be prepared the day before (longer is okay too).
You will want the room you are working in to be 72 degrees F./22 degrees C.
Gather all your supplies
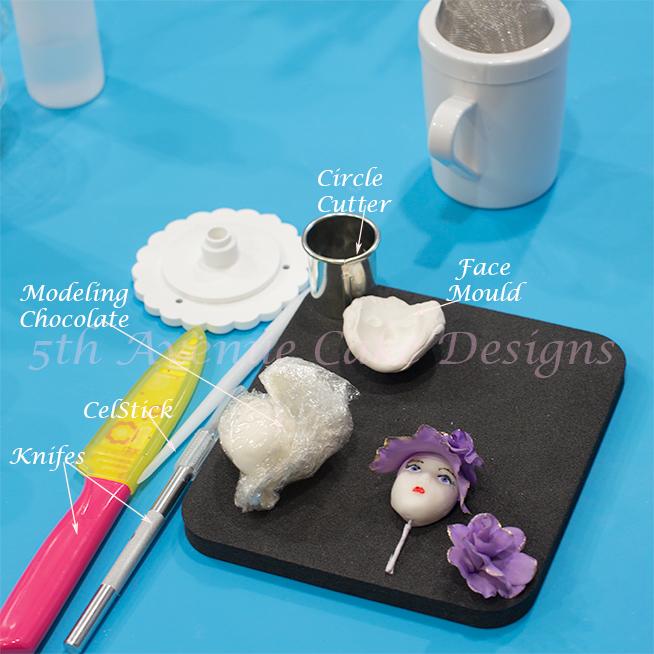
Supplies for constructing the the face and bonnet
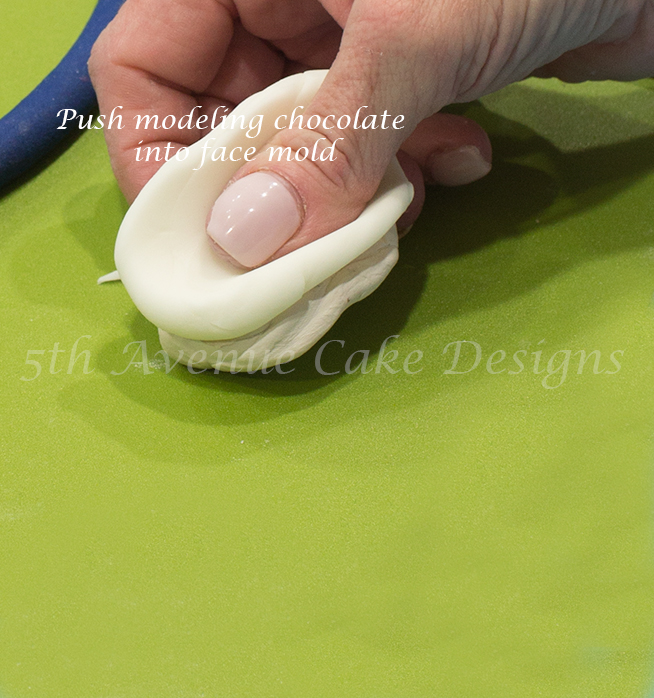
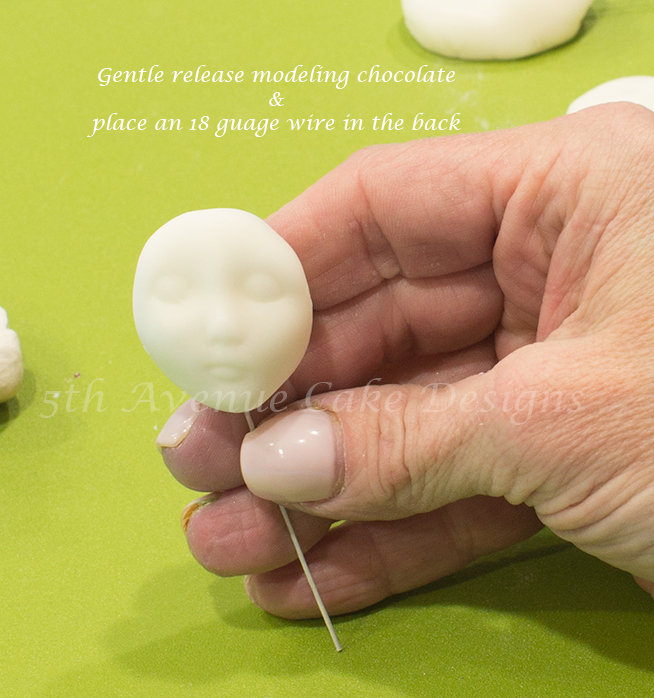
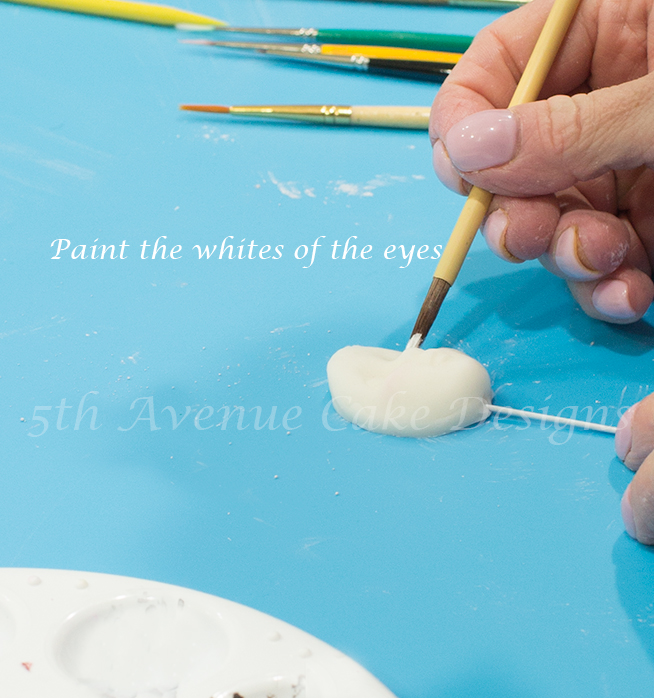
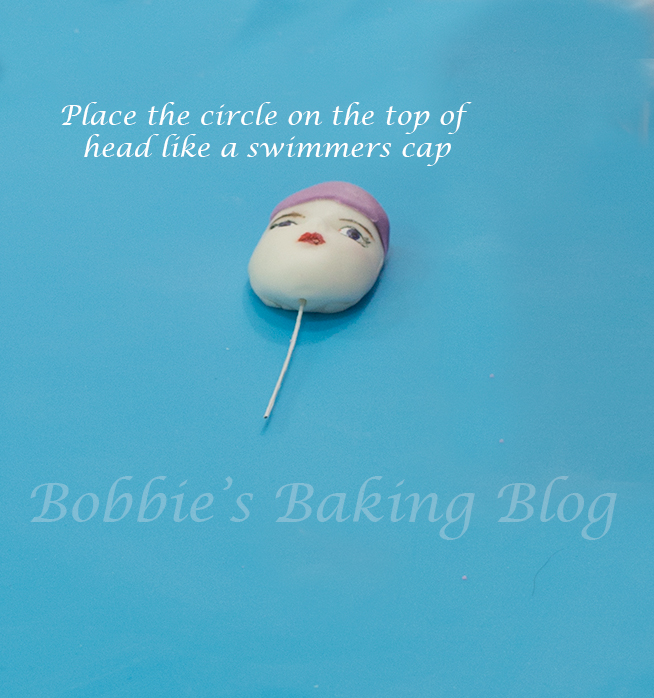
To create the face, use your white modeling chocolate, keep the modeling chocolate uncoloured for a transparent illusion. Roll a ball of the modeling chocolate into a large gum ball size ball. Turn the ball into an egg shape, lightly corn starch the mold, and push the modeling chocolate into the mold. Use your thumb to push the modeling chocolate against the mold, turn the mold toward your mat, and allow the face to gently release. Place a 24 gauge wire under the chin and cover with white floral tape.
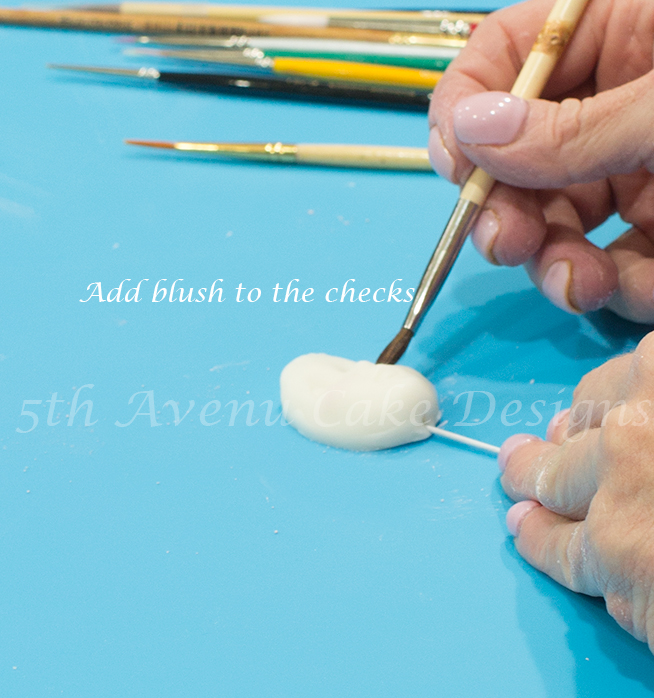
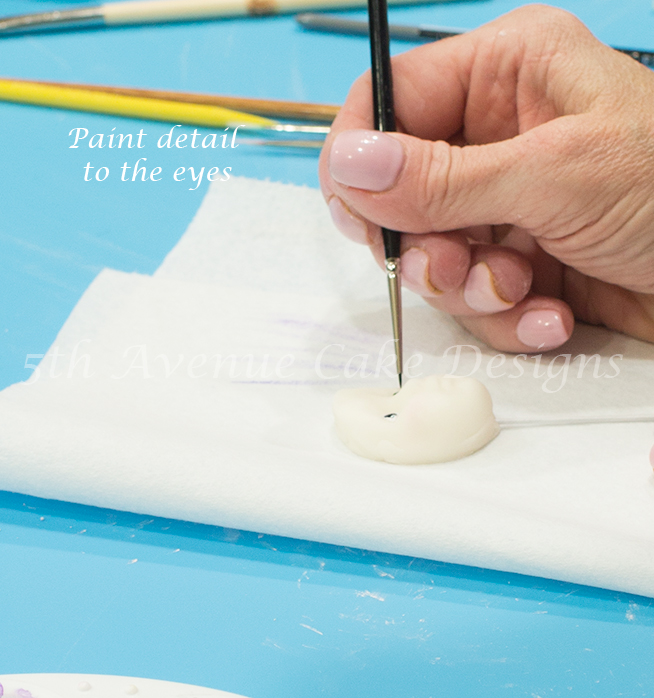
Now paint the details into her face, the eyes, blush, and lips. Add a drop of EverClear to each color of food paste to create an edible paint.
For gold accents, add few drops of vodka to gold luster for paint that is on the thicker side.
For the Bonnet/ Flowers:
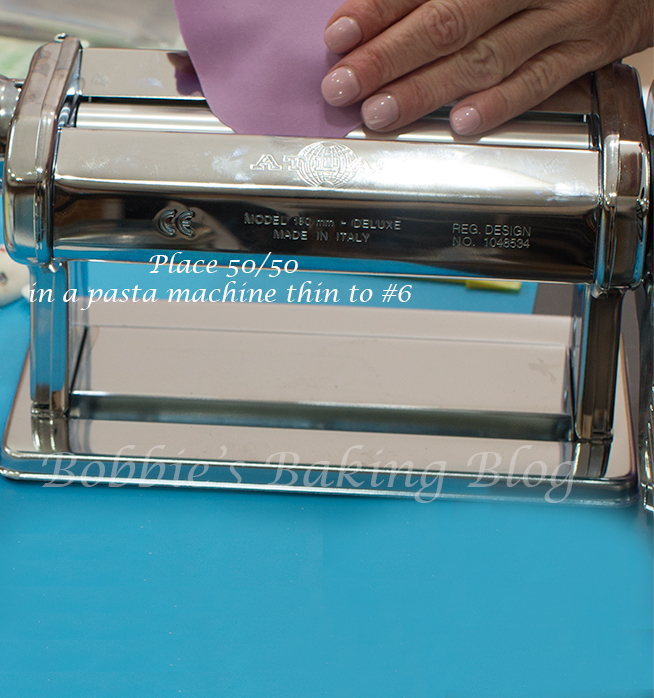
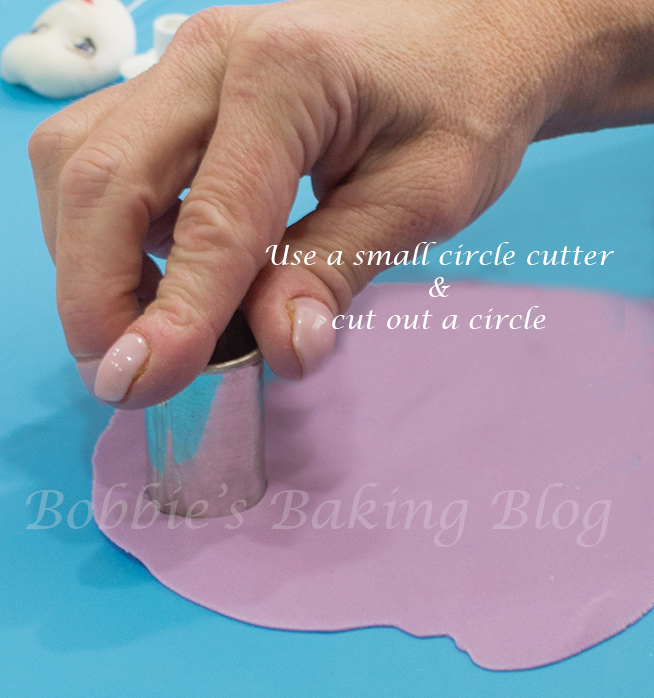
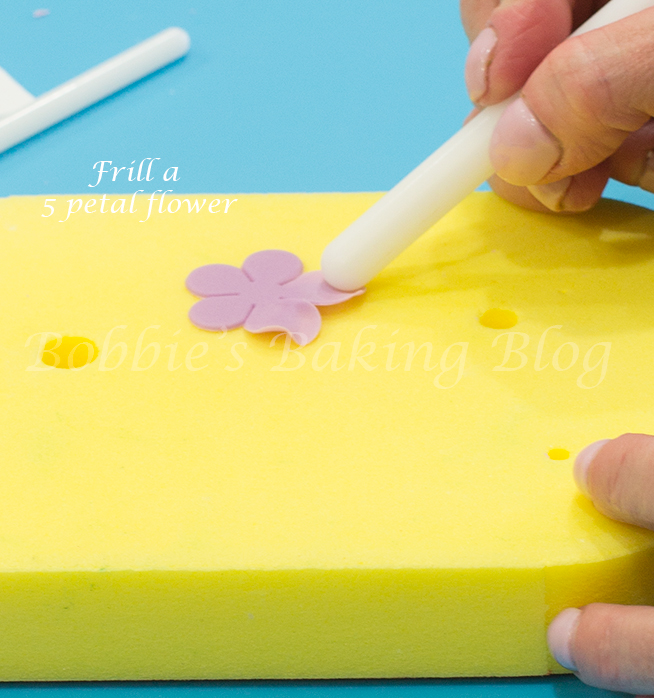
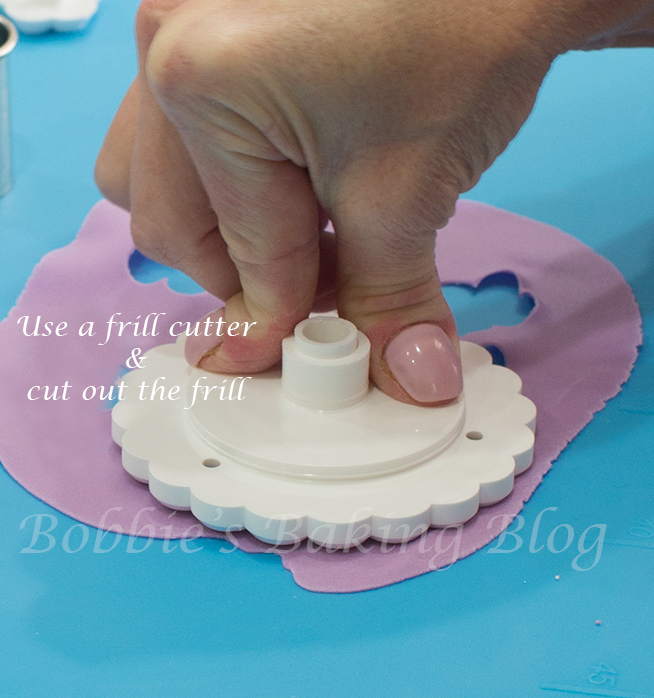
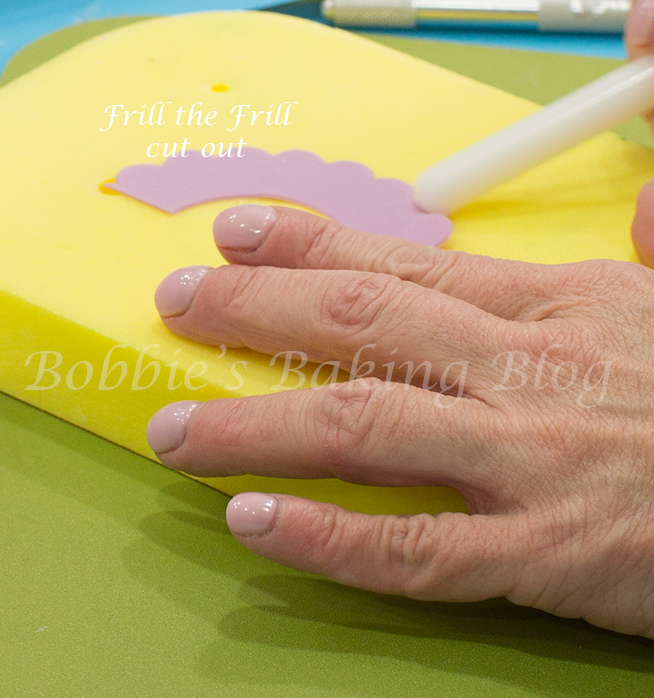
Knead 50/50 fondant and gumpaste, add desired food paste color, roll the 50/50 and place the 50/50 in a pasta machine. Gradually bring the 50/50 to #4 on the pasta machine. Cut one circle for the cap of the bonnet. Start by cutting the circle in half and apply with a little edible glue the hat (sugar water, egg white, and store bought) to the top of the ladies head, resembling a swimmers cap. Repeat the first two steps. Using your Garrett cutter, cut one frill circle and place the frill circle under a stay fresh mat. Cut 2 blossoms with your #5 petal cutter.
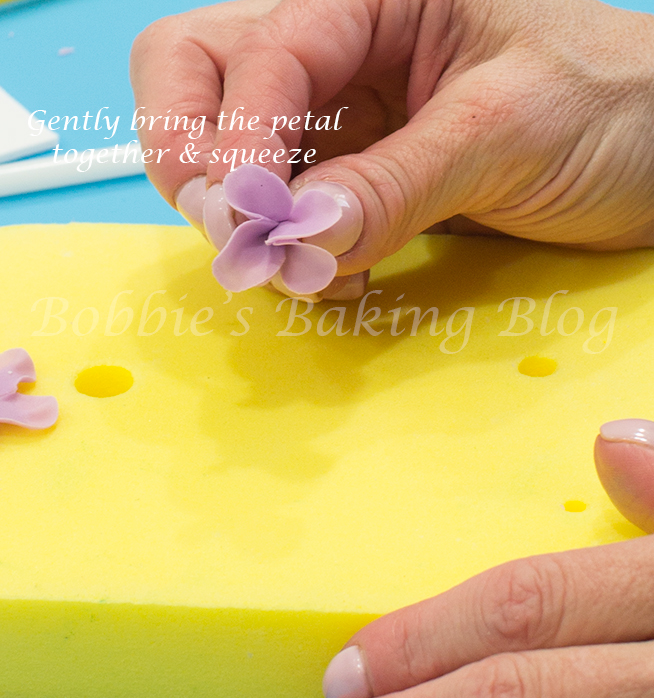
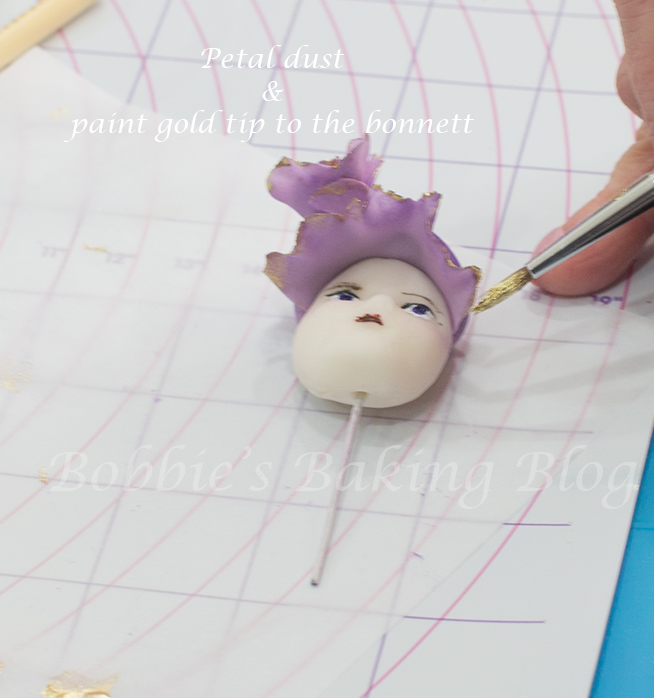
Frill one of the 5 petal blossoms on a foam pad. With the opposite end of your Celstick (not the point), holding the Celstick at a 45 degree angle begin to frill each of the five petals. Gather the petal from the bottom and pick each petal one at a time. Allow to dry for about 15 minutes, repeat the method on the second 5 petal blossom. Gently wrap the second blossom around the first. Allow to dry and set aside. Once dry, petal dust and add gold accent to the tip of the frill.
The Rim:
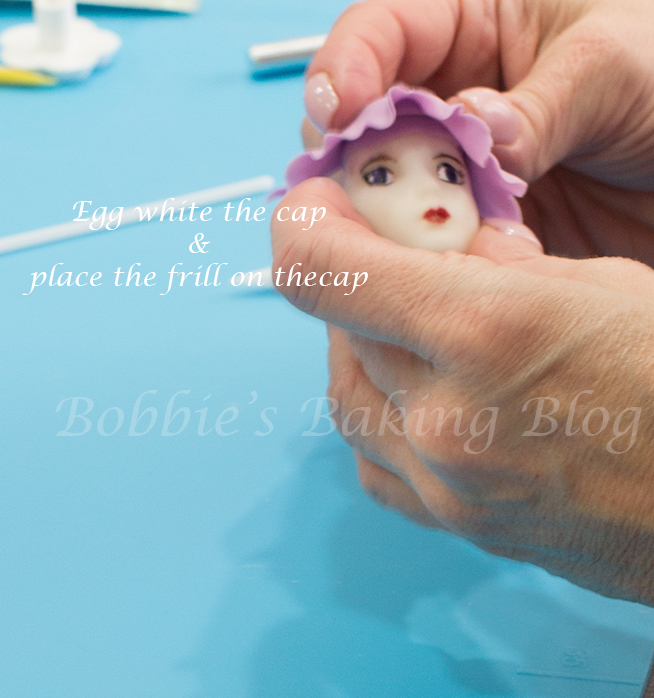
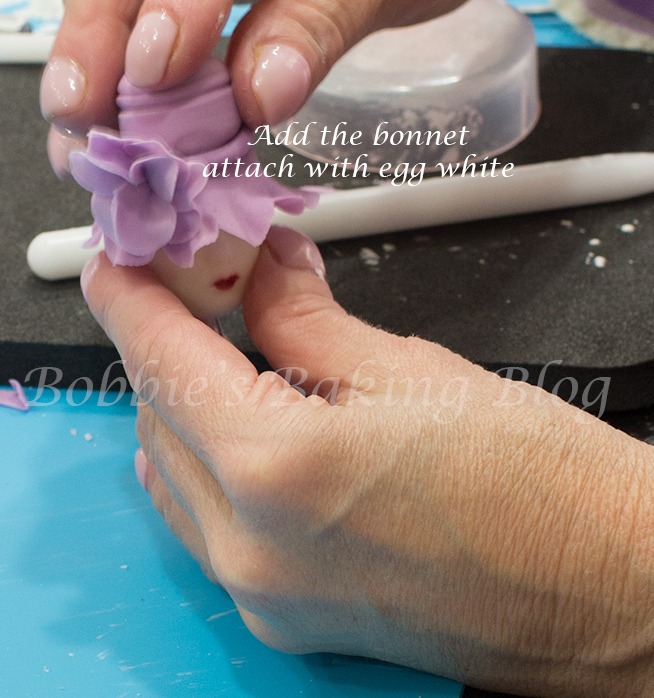
Transfer you garret frill to a foam pad, again using your blunt end of a medium Celstick frill the garrett circle. Hold the Celstick at a 45 degree angle, with firm pressure roll the celstick back and forth around the entire garrett circle. I prefer to use my pointer and index fingers to roll the Celstick. As you roll each grove of the circle, you will notice the 50/50 will begin to frill. Cut the circle open with either a knife, pizza cutter, or x-acto knife. Turn the open frilled garret so the opposite side is facing you, apply the edible glue, and attach to the cap. Create the top portion of the bonnet, and attach with the edible glue.
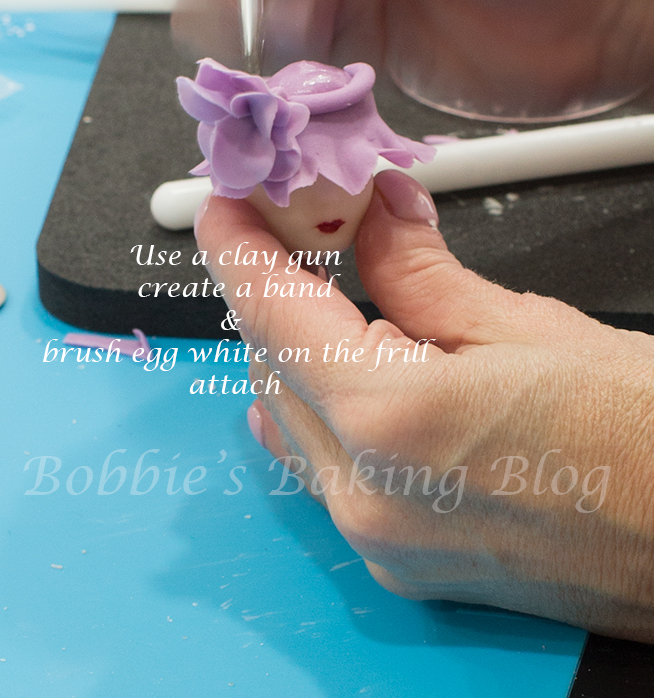
Using a clay extruder and the open round disk. Create a roll, attach it between the top of bonnet and the rim, now apply edible glue to the 5 petal blossom, and attach the blossom to the roll.
Allow the bonnet to dry, petal dust, and gold paint the rim on the tip of the bonnet.
Bonas video tutorial:
Sculpting the Body:

I wonder what they are looking at?
Fondant Ombre Frills:
Visit Spring Fondant Frill Mini Cake to see the the video tutorial!
Happy Cake Decorating!