
Welcome 2014, may the year be filled with love, peace, and hope!
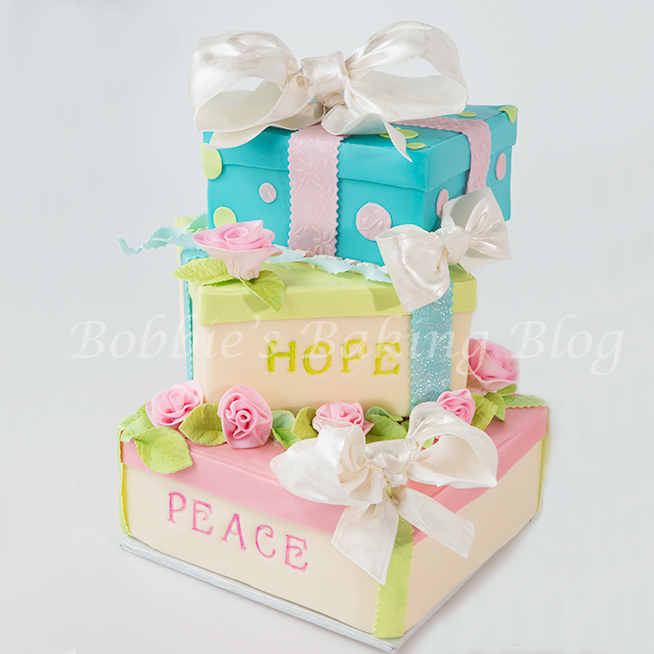
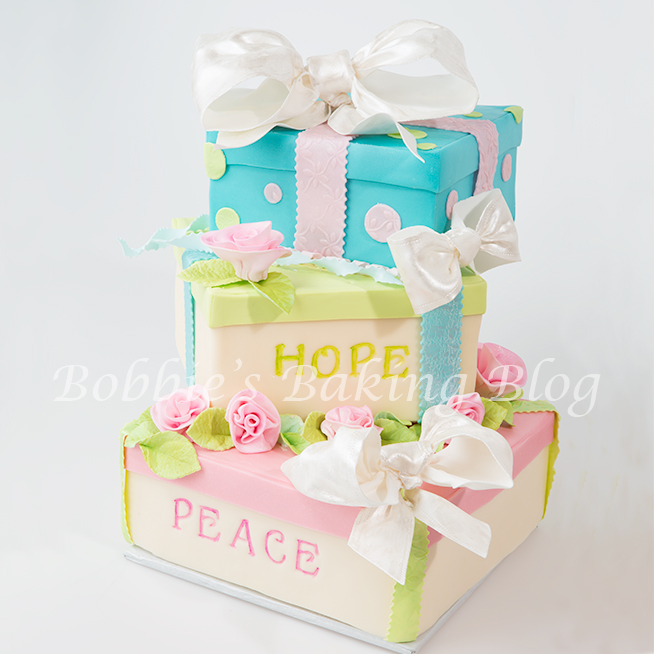
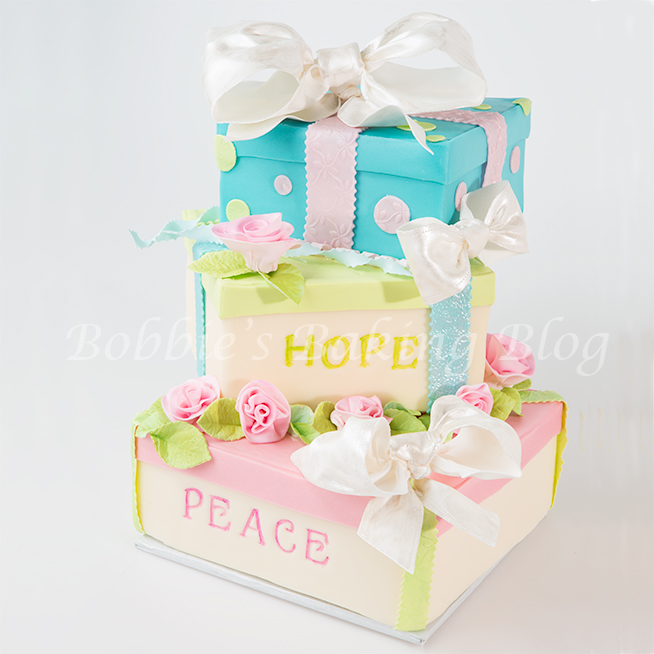
Sydney loves bows on boxes, she thought a three tier gift box cake with whimsical flowers, swirls, and of course bows would be an awesome New Year’s Eve cake! We wanted each tier to have it’s own special gift, the bottom is filled with peace, the middle with a year of hope, and the top love. The ribbons on each layer match the lid of the proceeding cake and we chose colors that are bright and cheerful.
As the last holiday of 2013 and first holiday of 2014 is upon us we wanted to give you a fun tutorial to start the New Year right as we say goodbye to 2013 before we welcome 2014.
New Year’s Eve 2014:
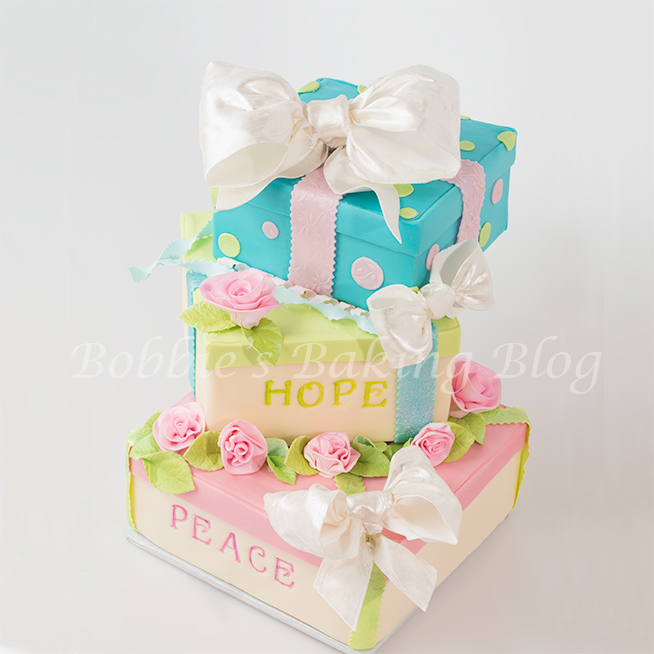
I adore the bright colors of each box!
Equipment:
- Pasta machine,optional
- Ruler
- Right angle
- Straight cutting wheel
- PME decorative cutting wheel
- Decorative rolling pins
- Circle cutters different sizes
- Artist brushes
- Pounce wheel
- Ribbon cutter
- A-ceto knife
- Rods
- Straws, all sizes
- Decorative stamps
- Scissors
- Rolled gauze wrap smooth with plastic wrap/ or plastic pieces cut into strips
- Airbrush, optional
- Paper cornet
Materials:
- Fondant
- Recipe for Madeira cake, you will need enough for 3 cakes
- Flower paste/gumpaste
- Color paste: electric green, fade proof pink, electric blue
- Petal dust: cosmo, kiwi, & lime
- Luster dust: pearl white,fairytale pink, fairytale blue, and lustre kiwi
- Pearl airbrush color, Lucks
- Everclear
- Edible glue, or egg white
- Cornstarch
- White chocolate melts, Merckens
- Freeze spray
Prepare your cakes and allow them to cool, colour your fondant. You will be using a panel method for each tier.
Prepare your mise en place.
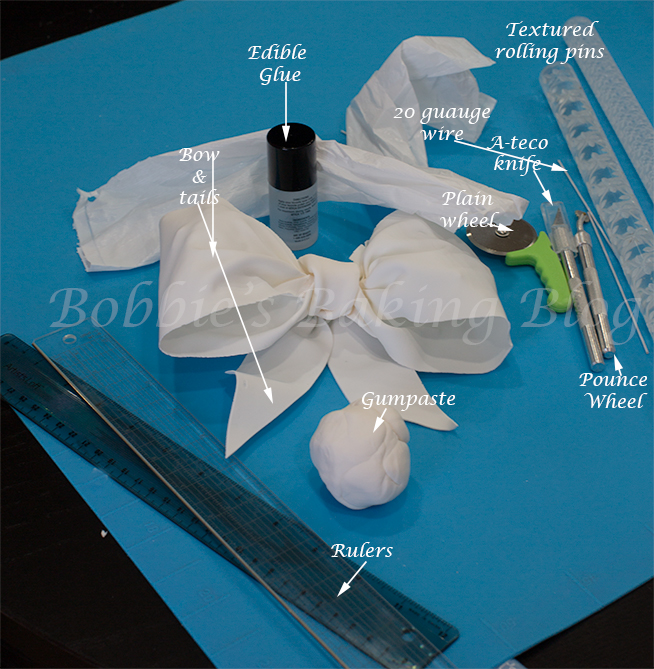
Pearl bow mise en place
We created our own edible glue with water, tylose and sugar, heat to dissolve, cool, and pour into a clean bottle with a brush, allow to rest overnight.
The Bows:
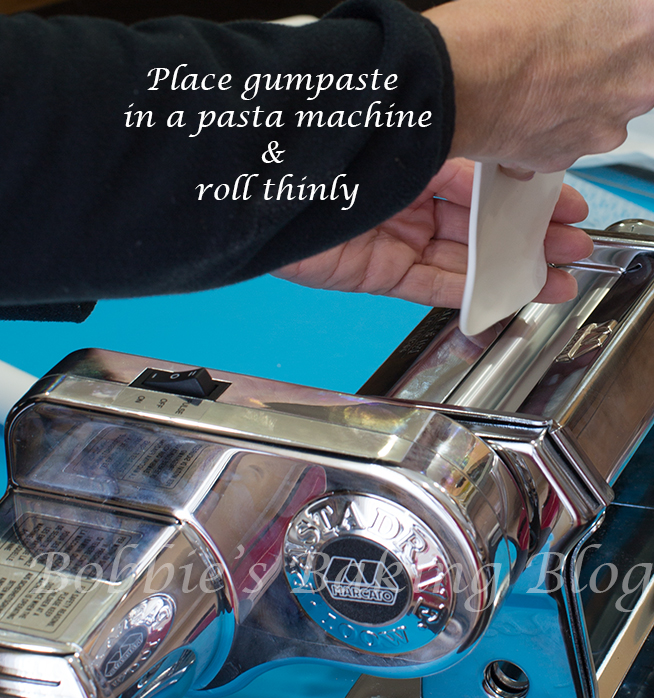
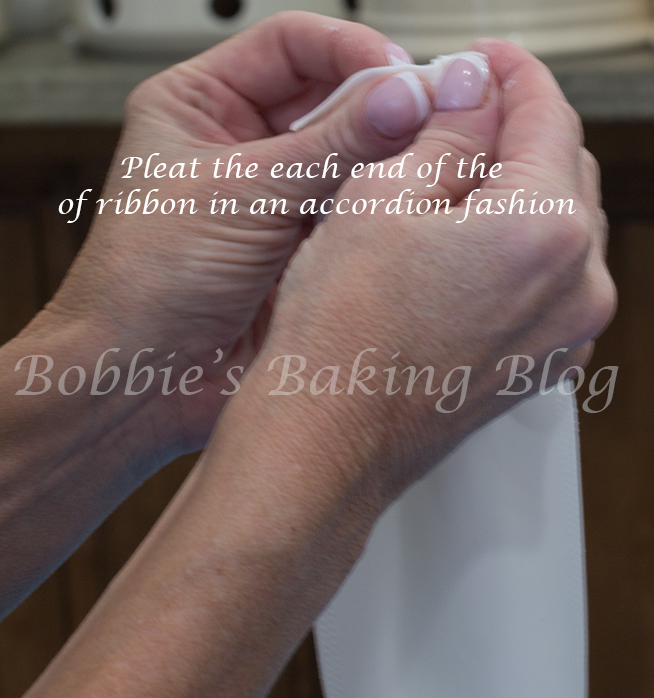
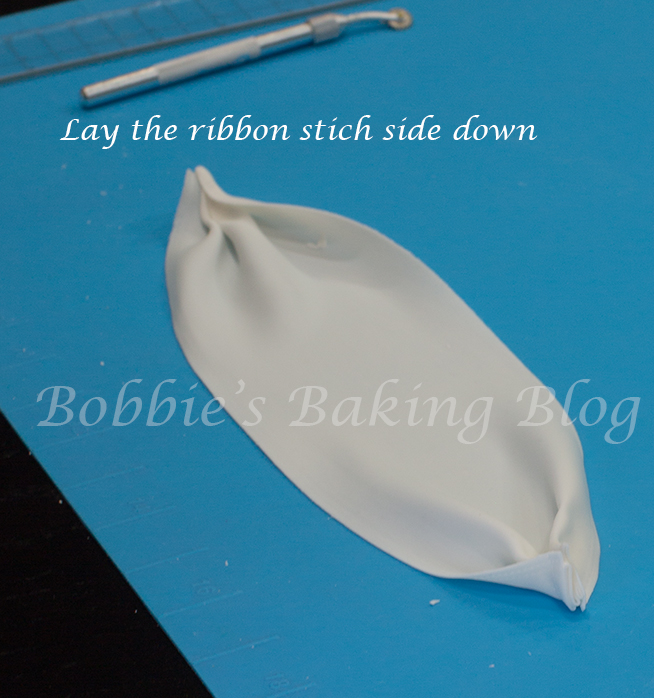
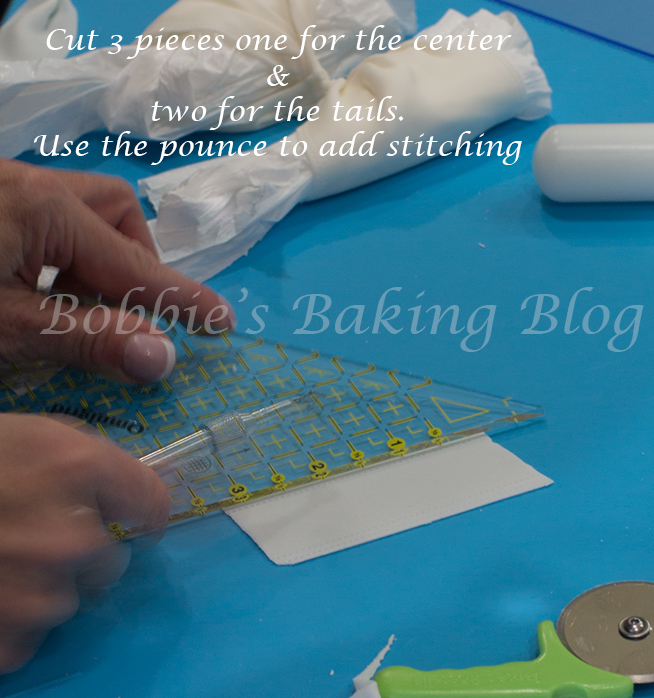
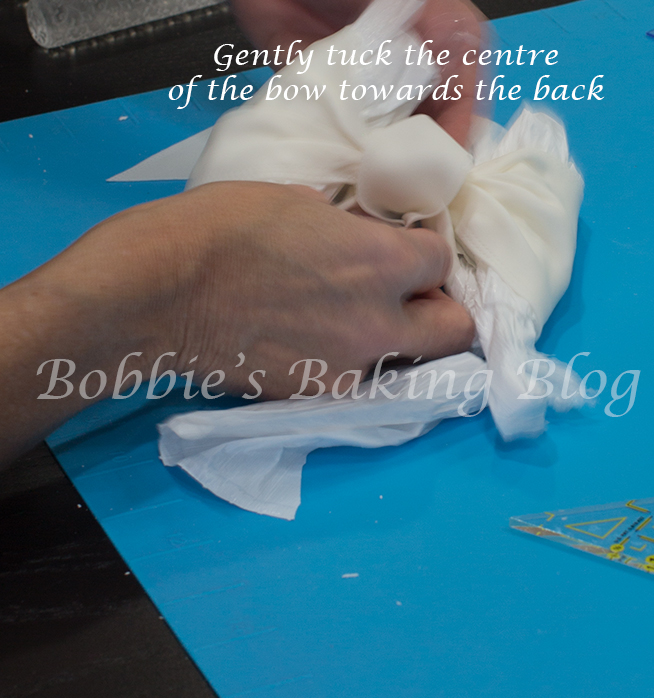
To create the bow with tails, we decide not to color the base (we choose white) so we could give it a pearl lustre. Prepare your flower paste/gumpaste, place a rolled rectangle of fondant in your pasta machine, roll the paste until you have reached a thin transparent long piece of flower paste/gumpaste. Even the piece into a rectangle, length and width of your choice, with your ruler and pounce wheel draw in stitching, gently bring the two long sides into the middle, mark the center lightly, pleat each end in an accordion fashion, and pinch together lightly.
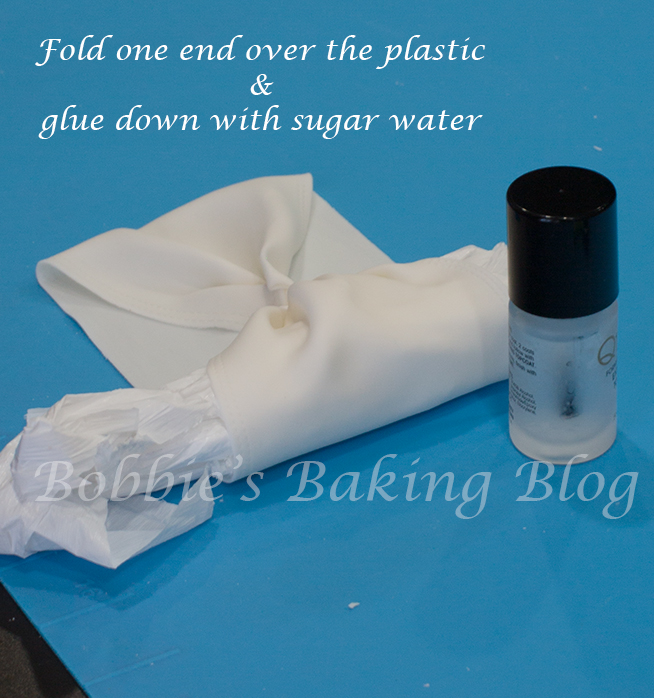
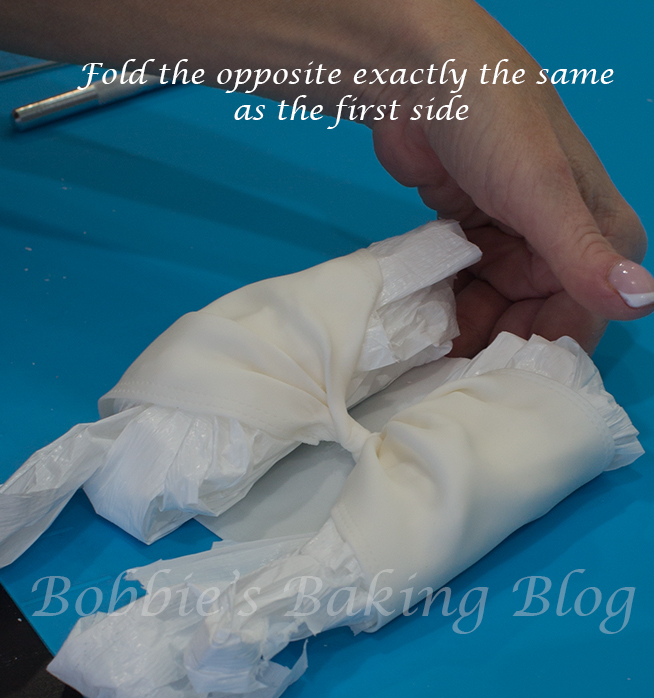
Take one of the end and gingerly wrap it around some looped plastic, use a small amount of edible glue, attach to the middle of bow, and repeat to the other end. Allow the bow to sit while you prepare the tails and centre.
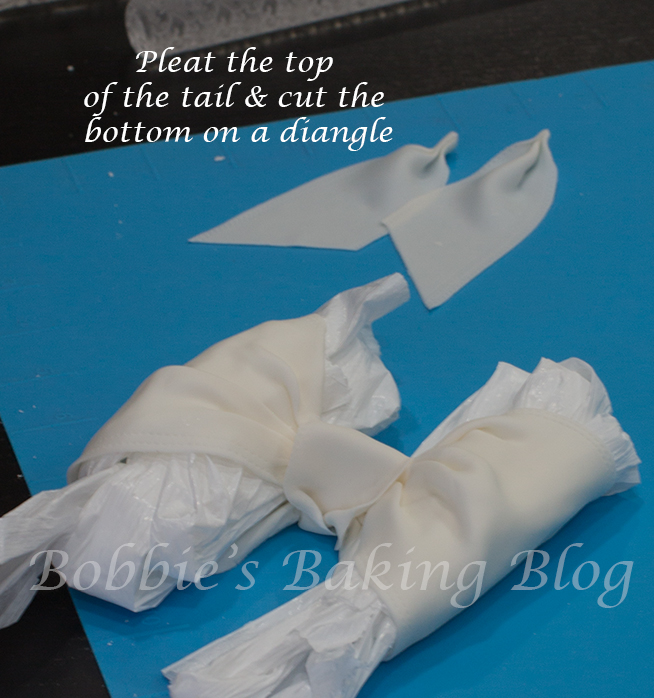
Cut two pieces of gumpaste equal size and width, add stitching, using a plain wheel cutter cut from the corner up on an angle. Repeat in the opposite direction on the second tail. For the centre cut a small piece, add stitching, fold lower end inward to create a crease and the upper end outwards, fold around the centre of the bow with a tiny amount of sugar water tuck the ends under. Add movement to the tails and allow to dry. For our cake we created three bows of different sizes and one without tails.
Once the bows were dry we painted them with pearlized lustre dust. Place the lustre dust into a small container and mix with vodka, the consistency should coat the bottom of the container, but not ripple, play with it for a little before painting. Air brush the bows with pearl airbrush colour or if you don’t have an air brush you can paint the bows with a mixture of pearl lustre dust and a few drops of Everclear. Use a large mop brush to paint.
Wrapped rose mis en place
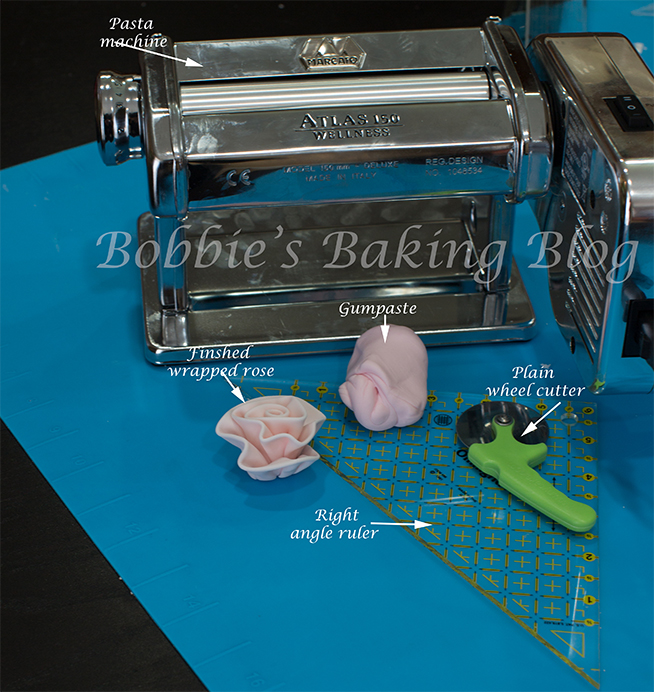
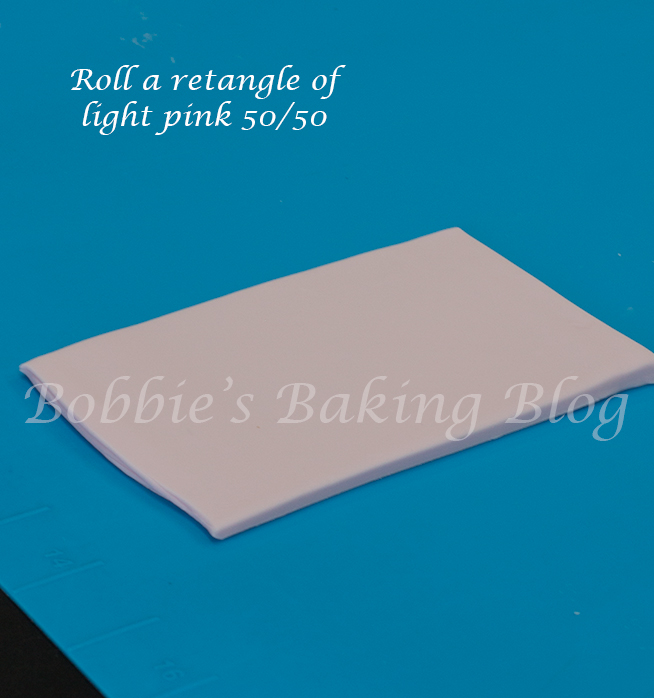
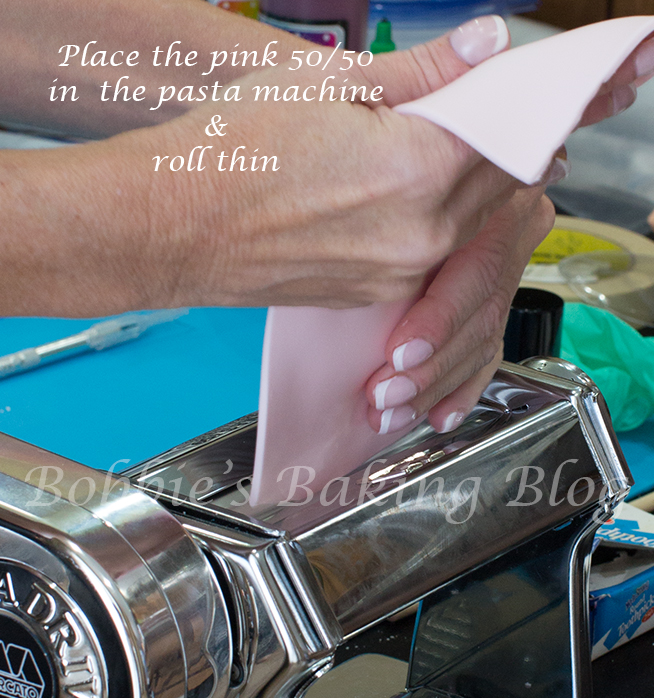
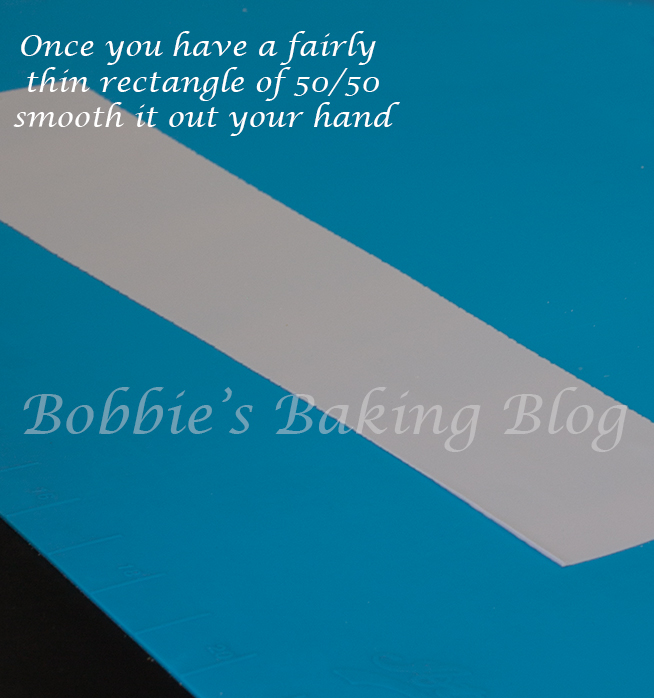
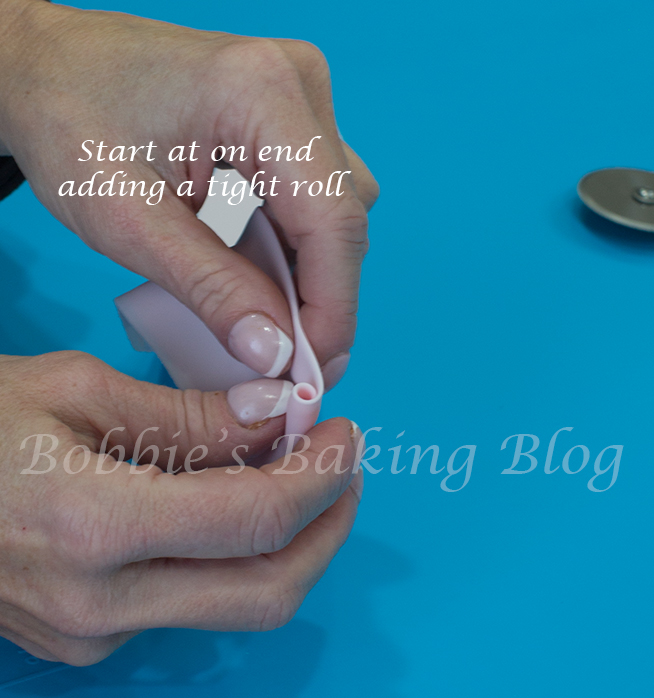
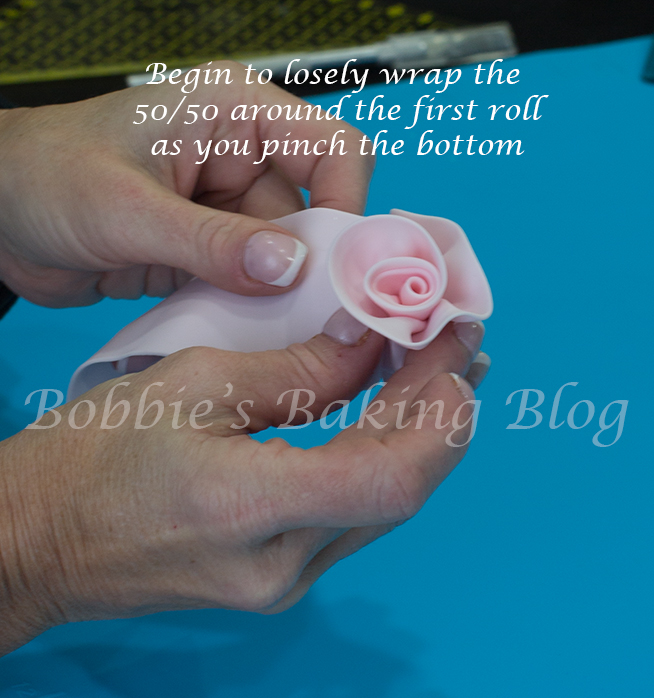
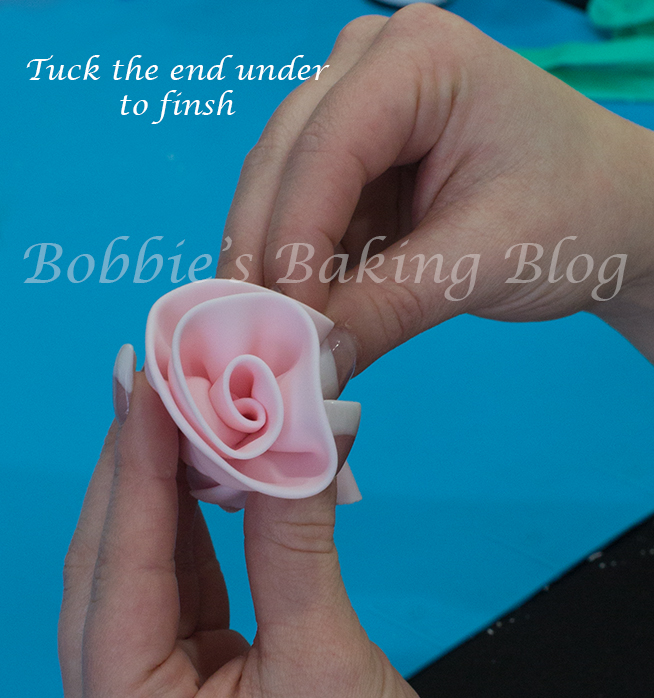
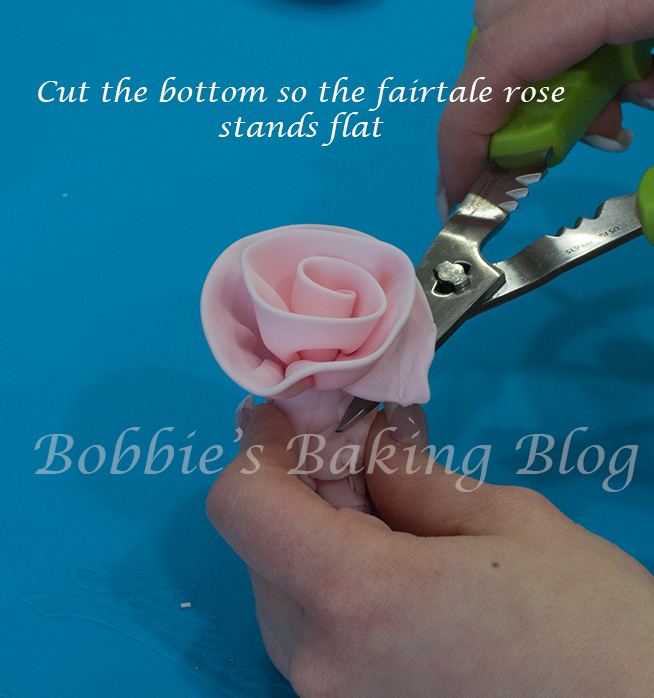
I call this wrapped rose “Fairytale Roses”, they remind me of Snow White. To create the roses mix 50% gumpaste with 50% fondant and color the 50/50 mixture (we colored them light pink). Start with a rectangle rolled out thin enough to fit in the pasta machine (if you do not have a pasta machine roll the paste transparent thin). Once rolled to transparency smooth with your hands and cut a rectangle. Fold the rectangle in half lengthwise, start at one end, roll tight in the center. As you begin to roll more 50/50 paste loosen the roll, pinching continuously after each fold, add a little curve, and tuck the end under to finish. Cut the bottom so the fairytale rose stands flat. Let dry before coloring with petal dust. Once the roses are dry dust with cosmo petal dust and fairytale pink.
To Attach the Bows and Rose
Melt you chocolate melt in the microwave, in 5 second intervals, until melted. Pour the melted chocolate in a paper cornet and pipe on the bows one at time. Spray with freeze spray. Repeat the same method for the roses.

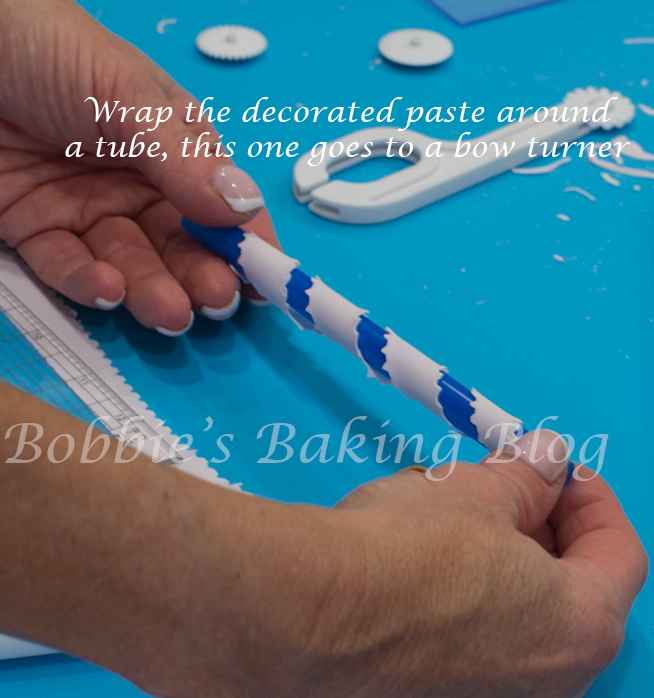
For the curly “Q’s” color gumpaste, cut strip with a decorative wheel, and wrap around different size rods, straws, or I found a bow turner set for .99 cents. Pretty much any thing round and long will work. Leave the colored gumpaste on the round until dry, carefully slip the curly “Q’s” off and dust.
For the circles place gumpaste in the paste machine or roll by hand, with even pressure stamp the paste. If the paste is sticky dust the top of the paste with cornstarch before stamping. With assorted circle cutters cut out the circles, dust with lustre dust, and apply with edible glue.
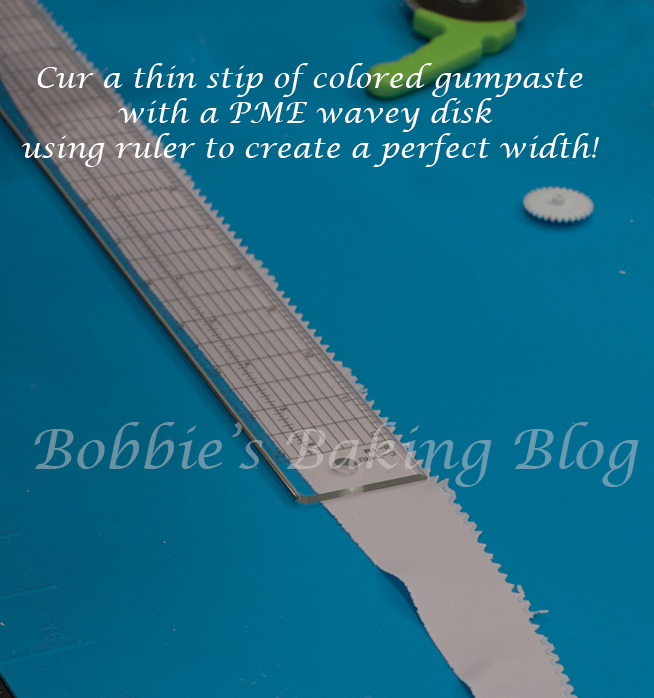
The ribbon that adorns each box were created with a ribbon cutter with different widths. Roll out gumpaste and roll with a decorative rolling pin, dust with lustre dust, and cut out strips in different width sizes. Attach with sugar water and tuck the ends underneath the cake. We chose for each box ribbon to be colored as the proceeding box.
This would be a perfect cake for any New Year’s party.
Happy Holidays!
Who doesn’t enjoy gift wrapped presents?
Enjoy!
Voila!


Trackbacks/Pingbacks