
Perfect for the Thanksgiving table, as place cards!
I wanted to create cornucopia sugar cookies for edible place cards on our Thanksgiving table; only I found I did not own a cornucopia cookie cutter. I wasn’t going to let that stop me I went into my cookie cutter storage drawers and found two cookie cutters to design DIY cornucopia sugar cookie. I used a witches hat and circle cookie cutter. I couldn’t be sure if my idea would work, I needed a trial run. Besides it was time to send a care package to Sydney and I knew she would find these cornucopia cookies adorable.
Once the cornucopias were baked and cooled I covered them in fondant and added texture. I then proceeded to airbrush them with shadows, low lights, high lights, and decorated the cornucopia. I am excited to share with you this fun and fairly easy cornucopia sugar cookie!
If you choose to use only royal icing, colour the royal icing ivory.
Cornucopia Sugar Cookie:
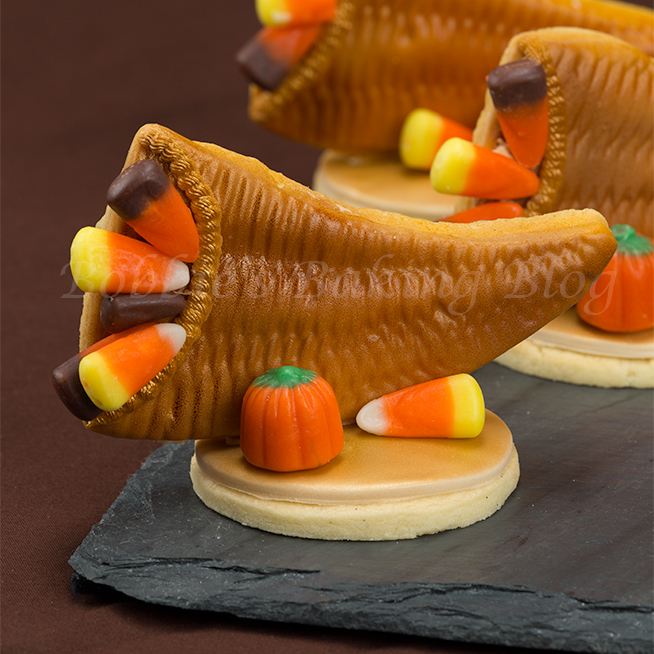
I thought it might be helpful to see the cornucopia close-up!
Equipment:
- Witches hat cookie cutter, or long triangle cutter
- Circle cookie cuttter
- Cornucopia chocolate mould
- Mini Rolling pin
- Airbrush
- Artist brush
- Empty cup
- Eye dropper
- PME #43 rope
- Mini pizza wheel cutter
- Artist plastic palate
Materials:
- 1-recipe vanilla bean sugar cookies
- Fondant, fondarific
- Airbrush edible colours, Ivory and brown
- Or
- Yellow, Chefmaster
- Gold, Americolor
- Pink,Chefmaster
- Brown, Americolor or Chefmaster
- Royal Icing
- Piping gel, CK
You will find most of the equipment and materials,including the airbrush here.
Once your cornucopia sugar cookies are baked and cooled you are ready to texture and cover your sugar cookies. In the video I explain if do not have a cornucopia chocolate mold you can achieve a similar look with bubble wrap, however if you pipe short thick royal icing lines (using #3 tip) it will look more realistic. That being said if you would rather cover your cornucopia sugar cookies with royal icing top coat (or flood) the cornucopia that will work just as well too. Allow the royal icing coat to completely dry, pipe short thick line of royal icing with a #3 piping tip and allow to dry. Now follow the exact same method in the video to colour.
I did not have ivory airbrush colour so I had to create the color with 2 drops of yellow, 1 drop of pink, and one drop of brown. That colour combination will achieve a nice ivory color. You will need an eye dropper to place a drop of that colour combination into the airbrush. I mixed the colours on a plastic palate.
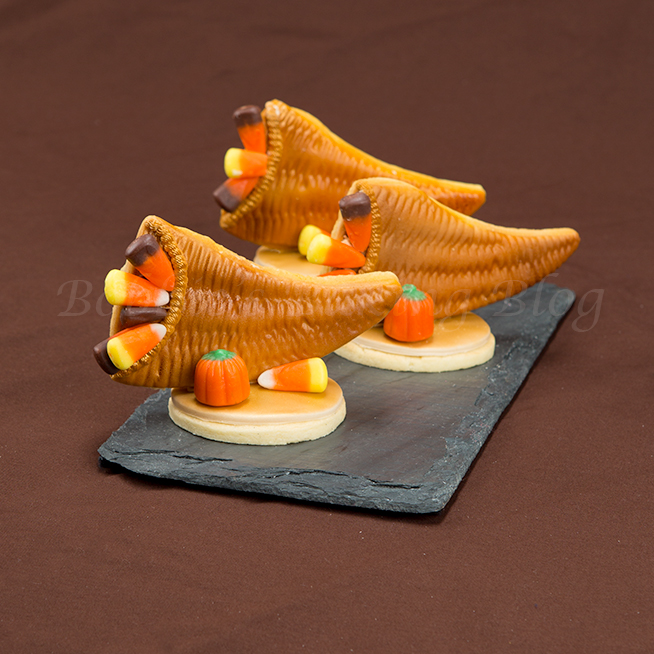
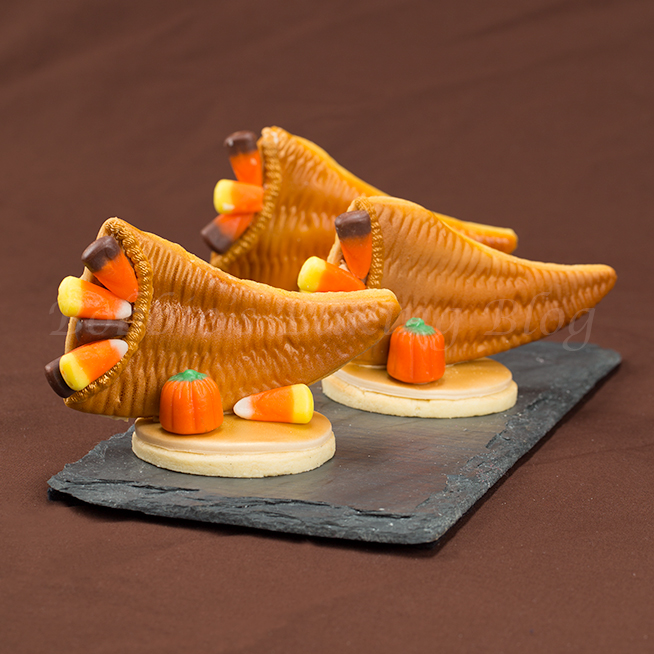
I pipe an ivory royal icing curved rope on to the cornucopia to give the illusion of a 3-D cornucopia and air brushed the rope golden brown. Next, I decorated the cookie with Brach’s autumn mix candy.
The stand was created with the same Blossom circle cookie cutter. Covered in mocha/cinnamon fondant and airbrushed gold.
If you have any questions please leave me a message.
These cornucopias are a blast to create!
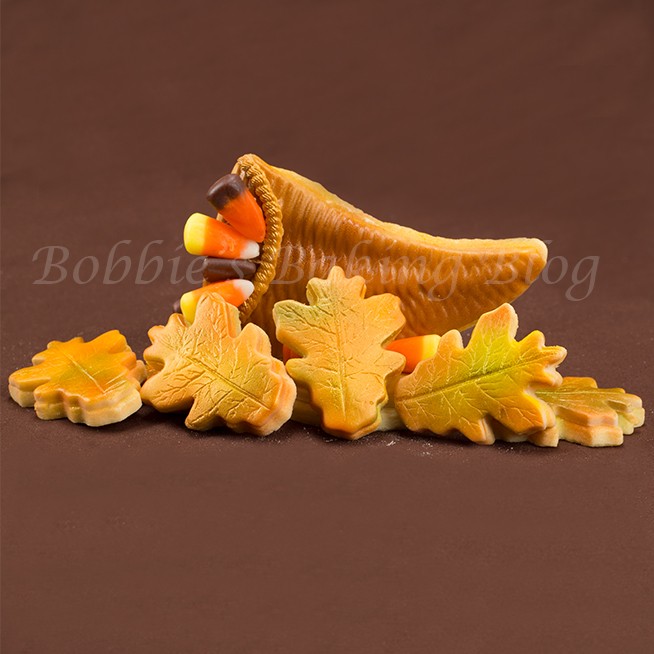
I will be showing a video on how to airbrush the leaves with a layering technique later this week!
Voila!
Enjoy!


Wow! Those are fantastic! : )
Thank you, Heather! 🙂